Guides & Tutorials
A Step-by-Step Guide: Jekyll Netlify CMS
Welcome to Netlify or should I say welcome to Netlify CMS, the first static site CMS system that can easily be integrated with almost any static site generator!
I know--it sounds too good to be true, but the age where static sites were defined by a lack of dynamic content, a lack of user interactivity and a lack of a CMS system is finally over!
In this little guide, we'll do a step by step, which will show you how to install and configure your own copy of our jekyll-netlify-cms template.
This is only the beginning however and we'll follow up with guides to our other Netlify CMS templates as well.
This guide assumes that you have Ruby and bundler installed
Netlify CMS Environments
Before we start, I'd like to talk a little about Netlify CMS and environments, as it is possible to run a netlify-git-api server for when you're working locally, as opposed to setting the environment variable to production and using GitHub's API when your site goes live.
We will describe both methods in this guide, by first setting up locally and second, by deploying to Netlify and using GitHub's API online.
Setup your GitHub Repository
We'll start by getting our own copy of the template and then we'll set up a local version and configure it, before letting Netlify build it, but one thing at the time.
1. Get your own copy
First you need to fork your own copy of the jekyll-netlify-cms template and give it a new name. If this is all new to you, head over to GitHub's help desk to learn about forking a repository.
2. Local Work Space
Make a local directory, open terminal and go to the location of this directory (cd my-local-repo-directory). This will be the location of your local site.
For convenience sake, keep the terminal window open throughout this guide
3. Get Repository URL
From the repo we made above, we want to clone a copy to our local directory. To do this we will first copy the remote GitHub URL (it will look like https://github.com/AccountName/RepoName.git or similar) from the above mentioned repo — the button looks like this:

Then we open a terminal window to the location of our local repo directory created above and finally we use the following command (substitute my-repo-url with the URL you copied from GitHub):
git clone my-repo-urlNetlify CMS: Local Environment
To setup the Netlify CMS, first we need to set up the web configuration of the CMS system in the config.yml of the admin folder of the site:
/my-site-location/admin/config.yml
Open the file and pay attention to which repo and branch the backend points to and notice you can also set the local URL if you so choose. Here's an example of the first ten lines of the config.yml, which contains this information:
development:
  backend:
    name: netlify-api
    url: http://localhost:8080

production:
  backend:
    name: github-api
    repo: owner/repo # Path to your GitHub repository
    branch: master # Branch to update (master by default)
It's pretty straight forward, but also very important to change the repo and branch, before you go live! Again, when working locally, you can use the default url, but once you start pushing to GitHub and deploying with Netlify, this has to be set correctly to a repo and branch you have created and now own!
1. The Netlify Git API
We will show how to set this up on your local computer as well as online, but first we'll try locally, so start by downloading the netlify-git-api that corresponds to your OS here.
If you are not interested in having a local environment, you may skip to the online environment here.
Decompress the netlify-cms-api file and add it to your path. These actions differ somewhat, depending on your operating system.
We will use the following commands in a terminal window to achieve these steps on Linux:
cd 'downloads'
unzip linux.zip
cd linux
sudo mv netlify-git-api '/usr/local/bin'
We enter the downloads folder and unzip the file. Then we enter the newly created directory created by unpacking and finally we move the netlify-git-api file to a directory that is in the PATH, making it easy to invoke from the terminal.
2. Setup your Gemfile
We want to use Jekyll 3.0.0 in our example, along with the jekyll-sitemap plugin. To do this, we open the Gemfile and change/add the following:
gem 'jekyll', '~> 3.0.0'
gem 'jekyll-sitemap'
At the time of writing the jekyll used for the template was 2.5.3, but we're having no issues with the newer version of Jekyll so far, so we're going ahead, but feel free to use the older version, if you so prefer.
3. Bundle Install
The following command will install the jekyll gem specified in the Gemfile, along with any other specified gems/plugins:
bundle installOnce you've used the command above, to install the listed gems, a Gemfile.lock file will be created in your directory. This makes sure that Netlify uses the same version of Jekyll, with the same versions of gems/plugins that you used to build your site.
4. Create Netlify CMS Users
From the terminal window, from your local repo directory, we need to run the following command for each user you wish to add (you will be asked for an email, a name and a password):
netlify-git-api users addAlternatively you can create a user, including the information necessary in a one liner like this:
netlify-git-api users add --name='User Name' --email=my@email.com --password=mypasswordYou need to create at least one user, to properly test the system.
5. Start Netlify CMS Server
Next we need to start the Netlify CMS server locally with the following command:
netlify-git-api serveThis will start the Netlify CMS Server.
Keep the Terminal Window open to keep the server running!
6. Build and Watch
Since we need the Netlify CMS Server to keep running, we need to open a second terminal window for the following.
From the new terminal window, from the root of your site (cd my-local-site), run the following command to build your site using bundle:
bundle exec jekyll server --watch7. Test the System
Open up a browser to the address below, log in and create a new post: https://localhost:4000/admin
Let's take a look at your new site and the post you just created through this link: https://localhost:4000
That's pretty much all there is to setting Netlify CMS up in a local environment.
Online Environment
Once you're done fiddling with the local version and maybe adding some posts, we should try out Netlify CMS with Jekyll in an online environment.
In the terminal window, CD to the root folder of your site and start by entering this command, to check where the project is pushed to:
git remote -vIf you're happy with the result, go ahead and add the new files with this command:
git add .And then commit the files you just staged in your local repository by entering the following line in terminal:
git commit -m 'First commit'The final step we need to do is push the project to GitHub and we use the following line for this:
git push -u origin masterYou'll be asked for login details for your account at GitHub and once they've been provided, the local project is pushed to GitHub.
We're done setting up the Jekyll with Netlify CMS template page, so let's connect it with Netlify and build this thing.
Connect to Netlify and Deploy to Production Environment
These final steps we need to go through are important ones and require that you pushed the repository to a GitHub repo you own!
Step 1: Add Your New Site
Creating a new site on Netlify is simple. Once you’ve created an account and logged in, you’ll be taken to https://app.netlify.com/sites. Click the "New Site" button to get started.
Step 2: Link to Your GitHub
Clicking “New Site” brings you to this screen: 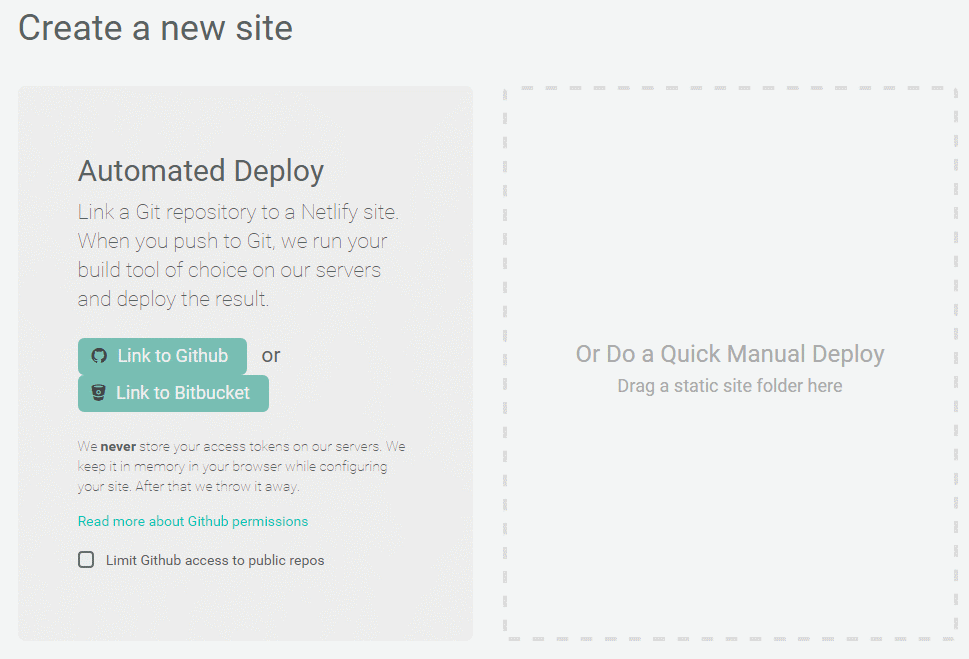 When you push to GitHub, Netlify does all the work. No more manual deploying of updates or changes! Since your assets are hosted on GitHub, we’ll need to link Netlify to GitHub. Click “Link to GitHub”.
Step 3: Authorize Netlify
You will be asked to provide your GitHub login details: 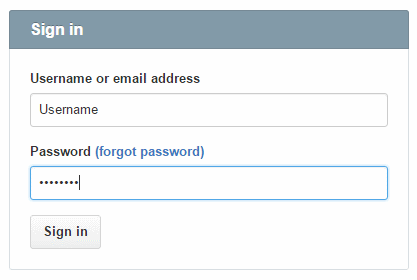
It’s time to allow Netlify and GitHub to talk to each other, so review the permissions and click authorize application. 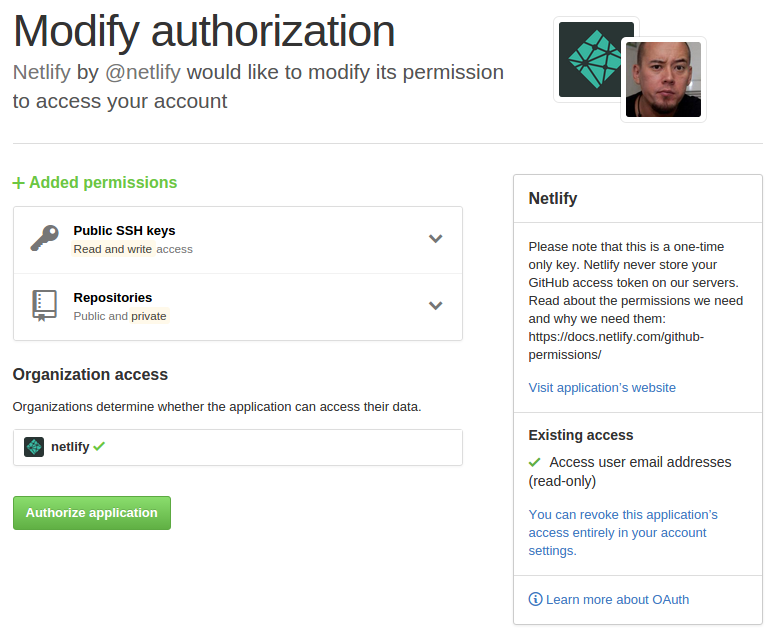
Like it says in the image above, Netlify doesn’t store your GitHub access token on our servers!
If you’d like to know more about the permissions Netlify requests and why we need them, you can visit our documentation on Git provider permissions.
Step 4: Choose Your Repo
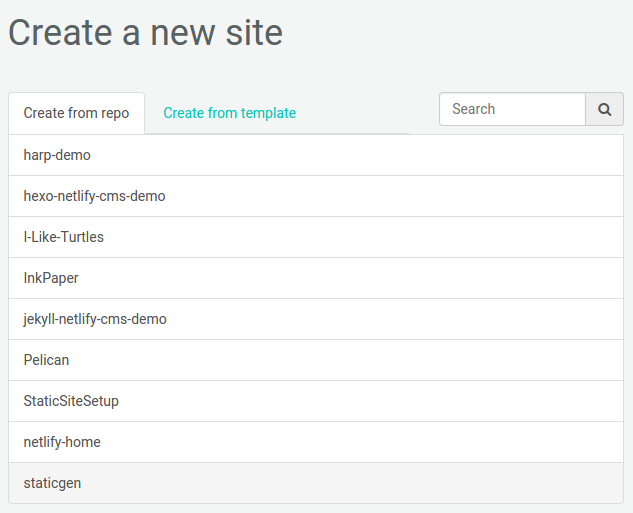
Once you're connected to GitHub, Netlify will show you a list of your Git repos, as seen above. For the purpose of this tutorial we'll select the “jekyll-netlify-cms-demo” repo we just pushed to GitHub.
Step 5: Configure Your Settings
Netlify can detect the build command you need with most site generators, Jekyll being one of them: 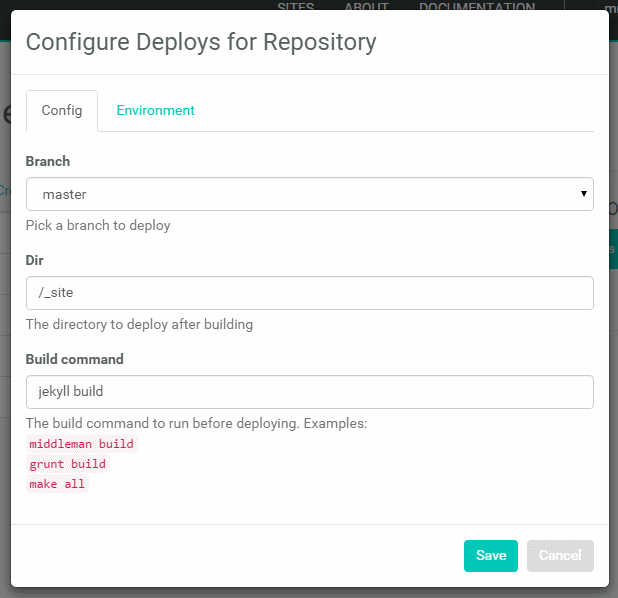
In most cases, there's nothing we need to configure, but for this build we need to set an environment variable under the environment tab, as seen below: 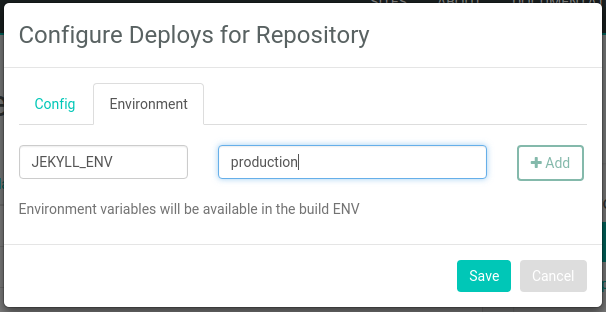
Take care that it's spelled exactly like shown, with capital letters on the left and normal letters to the right, like this:
JEKYLL_ENV = productionStep 6: Build Your Site
Once you click save, Netlify will step in and take over, though it will let you know what's happening on the way, as seen in this screen shot: 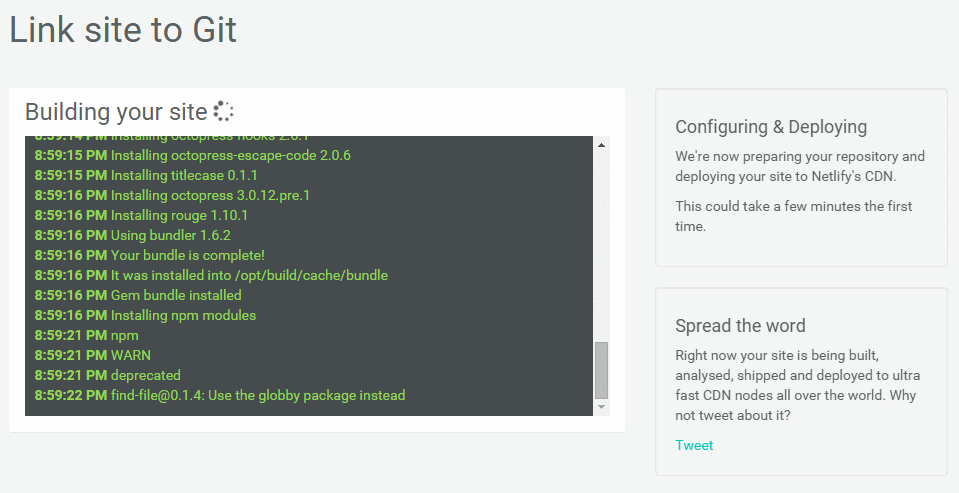
Now it’s time to sit back and relax, as the next step may take a few minutes. Take a break and Netlify will do the rest, while you watch the progress.
7. Register new Application.
Open up the GitHub developer application screen and select register a new application. Next fill out the application information as seen in the screen shot below — you can name and describe it however you want, but it is imperative that you use the exact URL for the Authorization callback as this: https://api.netlify.com/auth/done
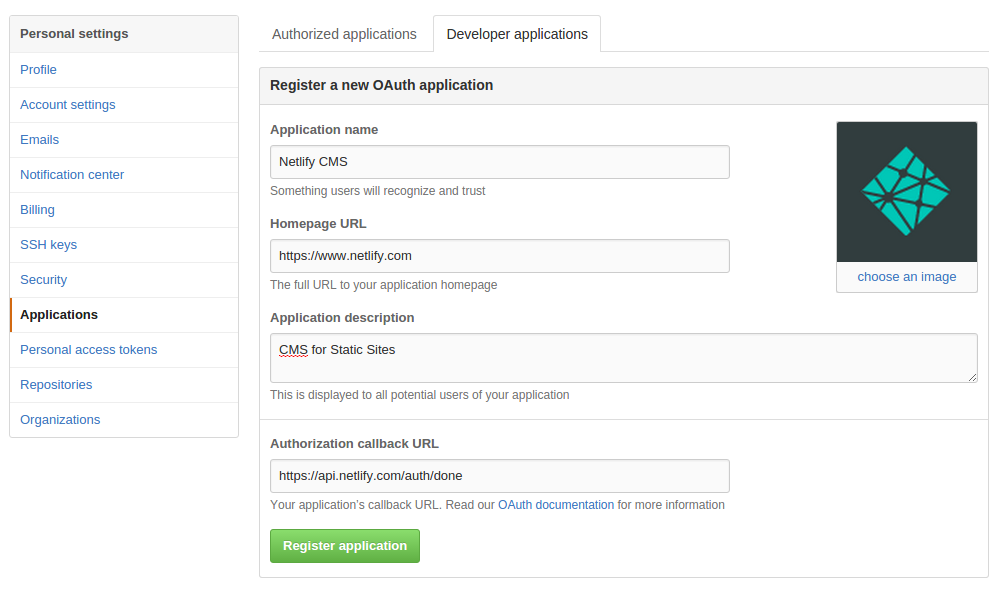
You can disregard choosing an image, though we did, to help distinguish the application. Once you're done filling out, simply click the green Register application button and you will get to the following screen shot (well, it will be similar at least):
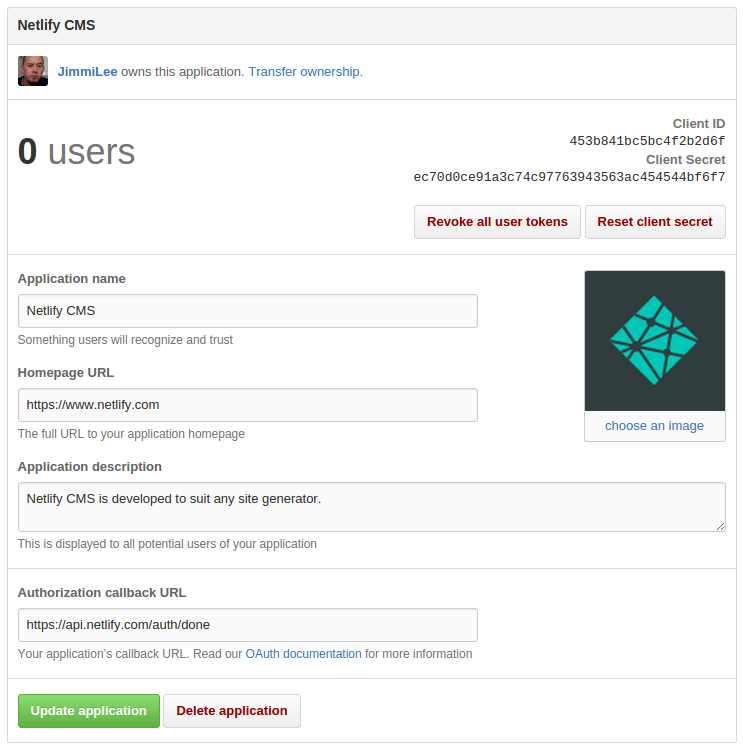
What you need to take note of here, is the Client ID and the Client Secret in the upper right corner. You will need to provide both in the next step!
8. Setup GitHub API Access
Return to Netlify and the site you just build and in the control panel select the Access panel.
This is where we give the GitHub Api access to our site with the application we just registered and you need to enter the Client ID and the Client Secret from above, as seen in the screen shot below:
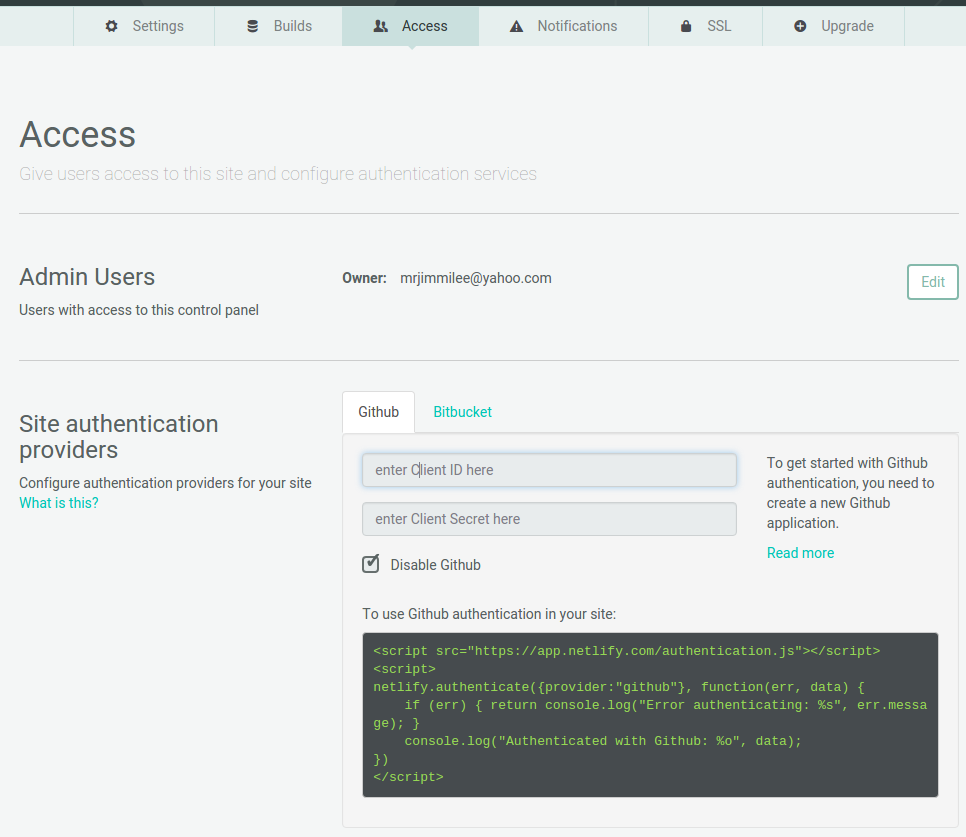
Simply paste them into the windows where it says enter Client ID here and below where it says enter Client Secret here and you're good to go.
Step 9: Trying Out Netlify CMS
We tried testing the CMS system locally earlier in this guide and it's virtually the same using it online, you just have to change the address to https://mysite.netlify.com/admin to access the CMS system and then log in with GitHub, since we're using GitHub auth when working online.
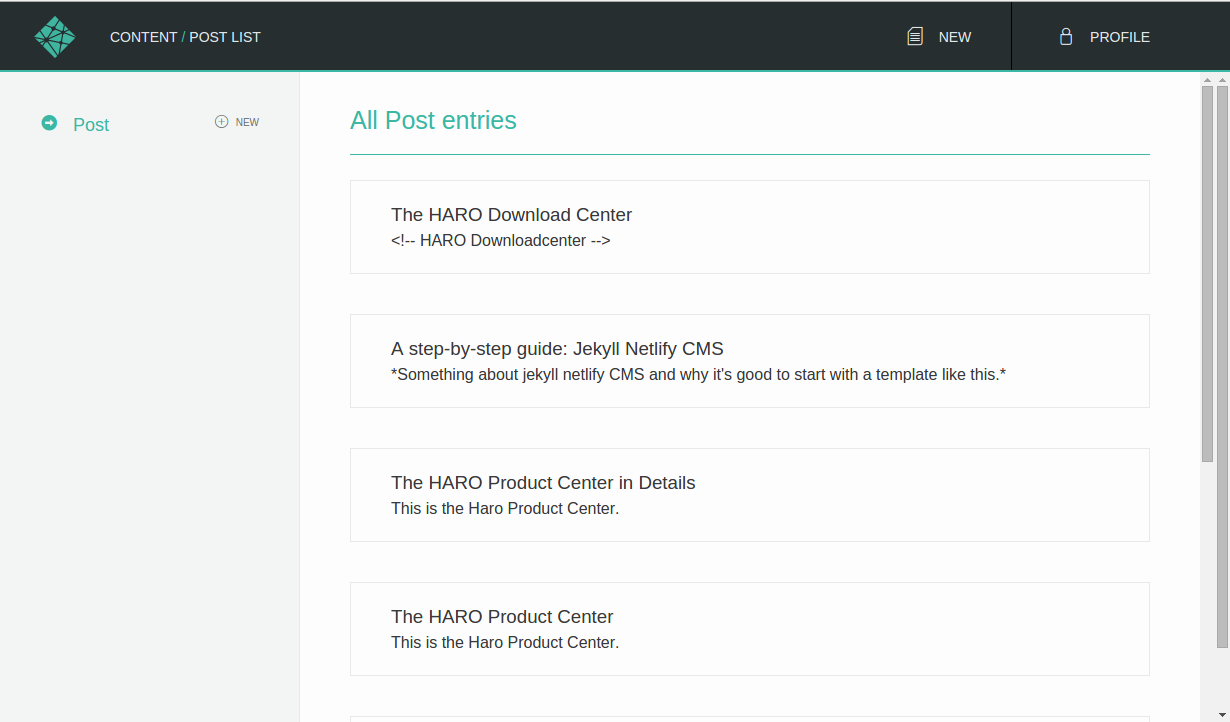
As you can see, it takes very little time and effort to get up and running, so give it a try — I'm sure you won't regret it.
You can see our demo site here: http://jekyll-netlify-cms-demo.netlify.com/ and the GitHub project for the site is here.


