Guides & Tutorials
Automate Order Fulfillment w/Stripe Webhooks & Netlify Functions
When selling products on your Jamstack site you can use Netlify Functions to automate your fulfillment process. In this tutorial, which builds on the code from our previous post, Learn How to Accept Money on Jamstack Sites, you'll learn how to automatically send an email to your fulfillment provider when a payment has been made so that they can send out the goods to your customers.
For this tutorial, we’ll use Sendgrid to send transactional emails. You’ll need an account if you’re coding along with us.
Heads up! Sending an email is just one example of an action that you can take when receiving a webhook from Stripe. You could also update your database, make a request to your inventory API, or any combination of actions to automate your fulfillment process — the Stripe webhook and Netlify Functions setup will be the same!
Set up the project
Before we start writing code, we need to make sure we have the appropriate credentials, environment variables, and dependencies to accomplish our task.
Add your environment variables in Netlify
To your Netlify dashboard, head to your "Deploy settings" under "Environment" add the following variables which we need to handle the webhook events and send emails with Sendgrid:
Variable
Description
SENDGRID_API_KEY
FULFILLMENT_EMAIL_ADDRESS
The email address of your fulfillment provider
FROM_EMAIL_ADDRESS
Your email address that SendGrid will send the email from
STRIPE_WEBHOOK_SECRET
Your Stripe webhook secret. Read below how to create it
Install dependencies
Next, install the stripe and @sendgrid/mail as dependencies for our functions:
# move into the functions directory
cd functions/

# install Stripe & SendGrid
npm i stripe && npm i @sendgrid/mail

# move back to the project root
cd ..
Create a serverless function to receive the webhook event and send the email
In your functions folder, create a new file: functions/handle-purchase.js. This function will:
- receive the Stripe webhook event, (a
POSTrequest sent from Stripe when the payment was successful), - verify that the request is legitimate,
- extract the purchase details, and
- send them via email to our fulfillment provider.
const stripe = require('stripe')(process.env.STRIPE_SECRET_KEY);

const sgMail = require('@sendgrid/mail');
sgMail.setApiKey(process.env.SENDGRID_API_KEY);

exports.handler = async ({ body, headers }) => {
  try {
    // check the webhook to make sure it’s valid
    const stripeEvent = stripe.webhooks.constructEvent(
      body,
      headers['stripe-signature'],
      process.env.STRIPE_WEBHOOK_SECRET
    );

    // only do stuff if this is a successful Stripe Checkout purchase
    if (stripeEvent.type === 'checkout.session.completed') {
      const eventObject = stripeEvent.data.object;
      const items = eventObject.display_items;
      const shippingDetails = eventObject.shipping;

      // Send and email to our fulfillment provider using Sendgrid.
      const purchase = { items, shippingDetails };
      const msg = {
        to: process.env.FULFILLMENT_EMAIL_ADDRESS,
        from: process.env.FROM_EMAIL_ADDRESS,
        subject: `New purchase from ${shippingDetails.name}`,
        text: JSON.stringify(purchase, null, 2),
      };
      await sgMail.send(msg);
    }

    return {
      statusCode: 200,
      body: JSON.stringify({ received: true }),
    };
  } catch (err) {
    console.log(`Stripe webhook failed with ${err}`);

    return {
      statusCode: 400,
      body: `Webhook Error: ${err.message}`,
    };
  }
};
Why do we need to verify the webhook signature?
Since this will instruct our fulfillment provider to send out physical goods, we need to make sure that this request was actually sent by Stripe and not created by a malicious third-party.
For this we use our STRIPE_WEBHOOK_SECRET and the stripe.webhooks.constructEvent helper from stripe-node. When testing locally, the webhook secret will be returned to you by the Stripe CLI, otherwise you will retrieve the webhook secret from the Stripe Dashboard when creating your production webhook endpoint.
Forward webhook events to your local server with the Stripe CLI
In the previous tutorial, we learned how to run functions locally using ntl dev. Testing webhook events locally can be challenging since your local server (localhost) is not reachable via the internet.
To make local development and testing possible, Stripe provides a CLI that allows you to forward webhook events to a server running locally.
Install the CLI and link your Stripe account.
Open a second terminal window since this needs to be running at the same time as your development site, then start the Stripe CLI with the following command:
stripe listen --forward-to localhost:8888/.netlify/functions/handle-purchaseThe CLI will print a webhook secret key to the console. Set STRIPE_WEBHOOK_SECRET to this value in your Netlify "Deploy settings" under "Environment".
Heads up! After setting the webhook secret in your Netlify dashboard you will need to stop and restart
ntl devfor it to be available locally.
Deploy to production
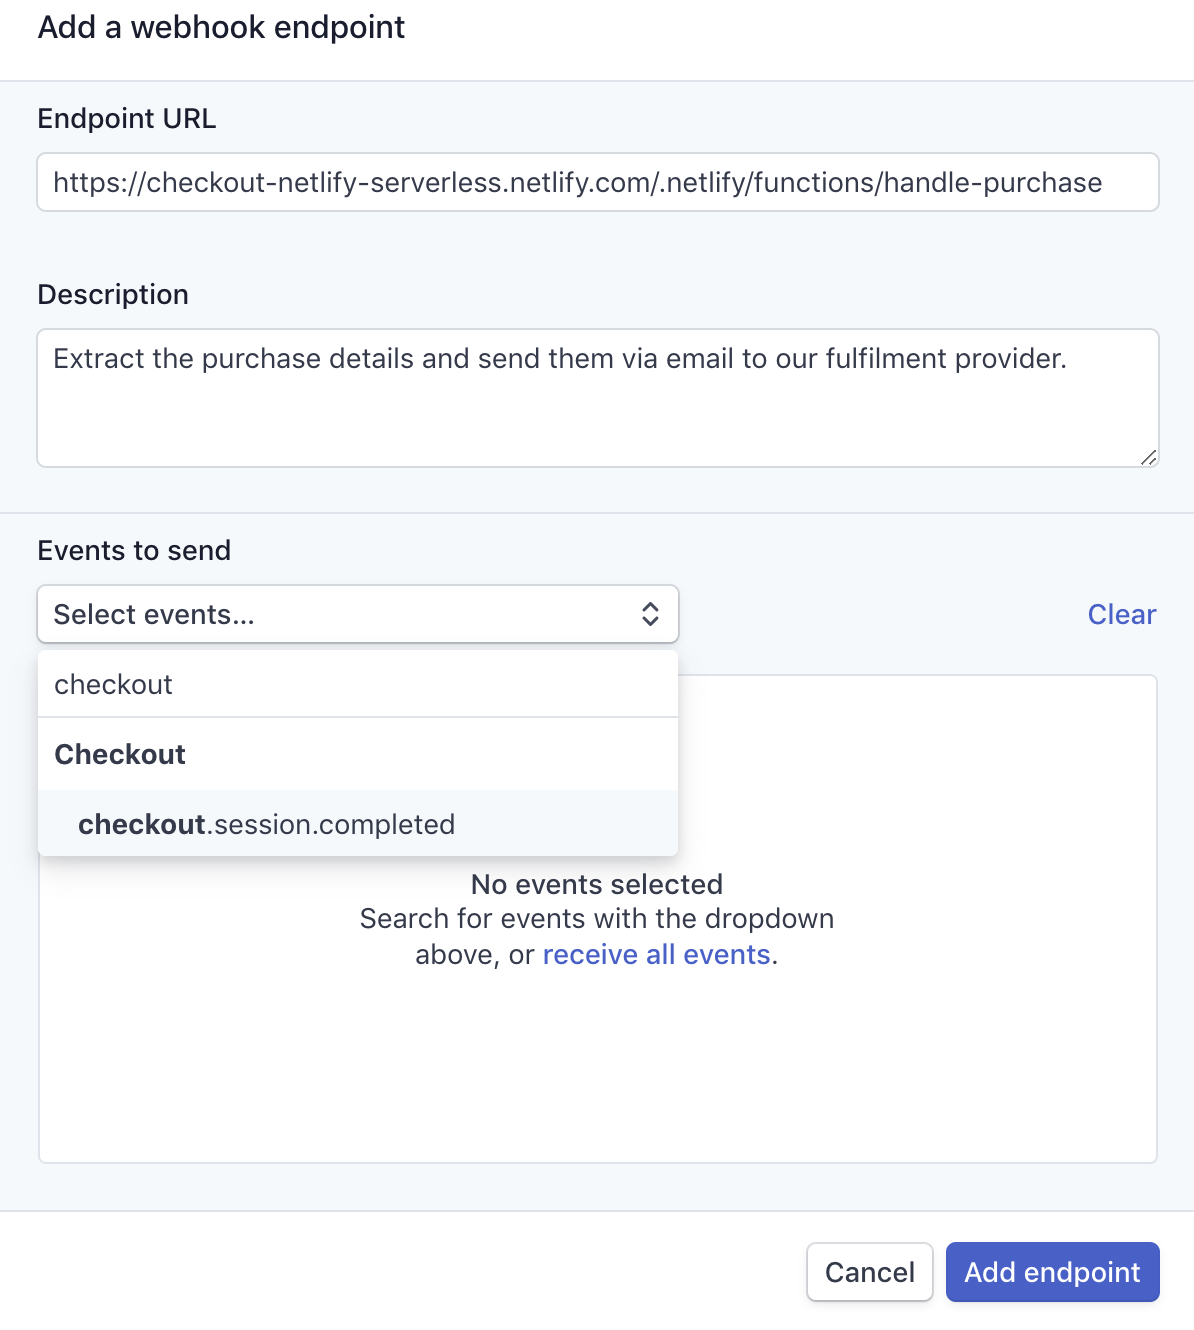
When you're ready to move things to live mode, add a new webhook endpoint in your Stripe Dashboard:
- Endpoint URL: https://your-domain.com/.netlify/functions/handle-purchase
- Events to send:
checkout.session.completed

After you click the "Add endpoint" button, you will see your webhook details, including a panel to reveal the webhook secret.

Click the "Click to reveal" button and copy the webhook secret to your Netlify environment settings as the STRIPE_WEBHOOK_SECRET variable.
Heads up! After setting the webhook secret in your Netlify dashboard you will need to redeploy your site for it to be available in your function.
Once your functions finish deploying, you’re up and running! All successful purchases will now be sent to this function by a Stripe webhook and your fulfillment center will automatically be notified of new sales!
What to do next
For more information, check out the source code for this example and give it a try!
How will you use webhook notifications to power your e-commerce Jamstack site? Let us know on Twitter!


