Guides & Tutorials
How Algolia Created Its Netlify Build Plugin
This post was contributed by our friends at Algolia.
We recently released the Algolia Netlify plugin. You can read more about the plugin, watch an intro, or get started with it right away. Algolia is a flexible search and navigation platform, which enables cutting-edge, web, app and e-commerce experiences. This post is a deep dive about how we built it and offers some insights for other creators of Netlify build plugins.
Learn more about how to use Netlify Build Plugins or create your own Netlify Build Plugin.
What is the Algolia Netlify plugin?
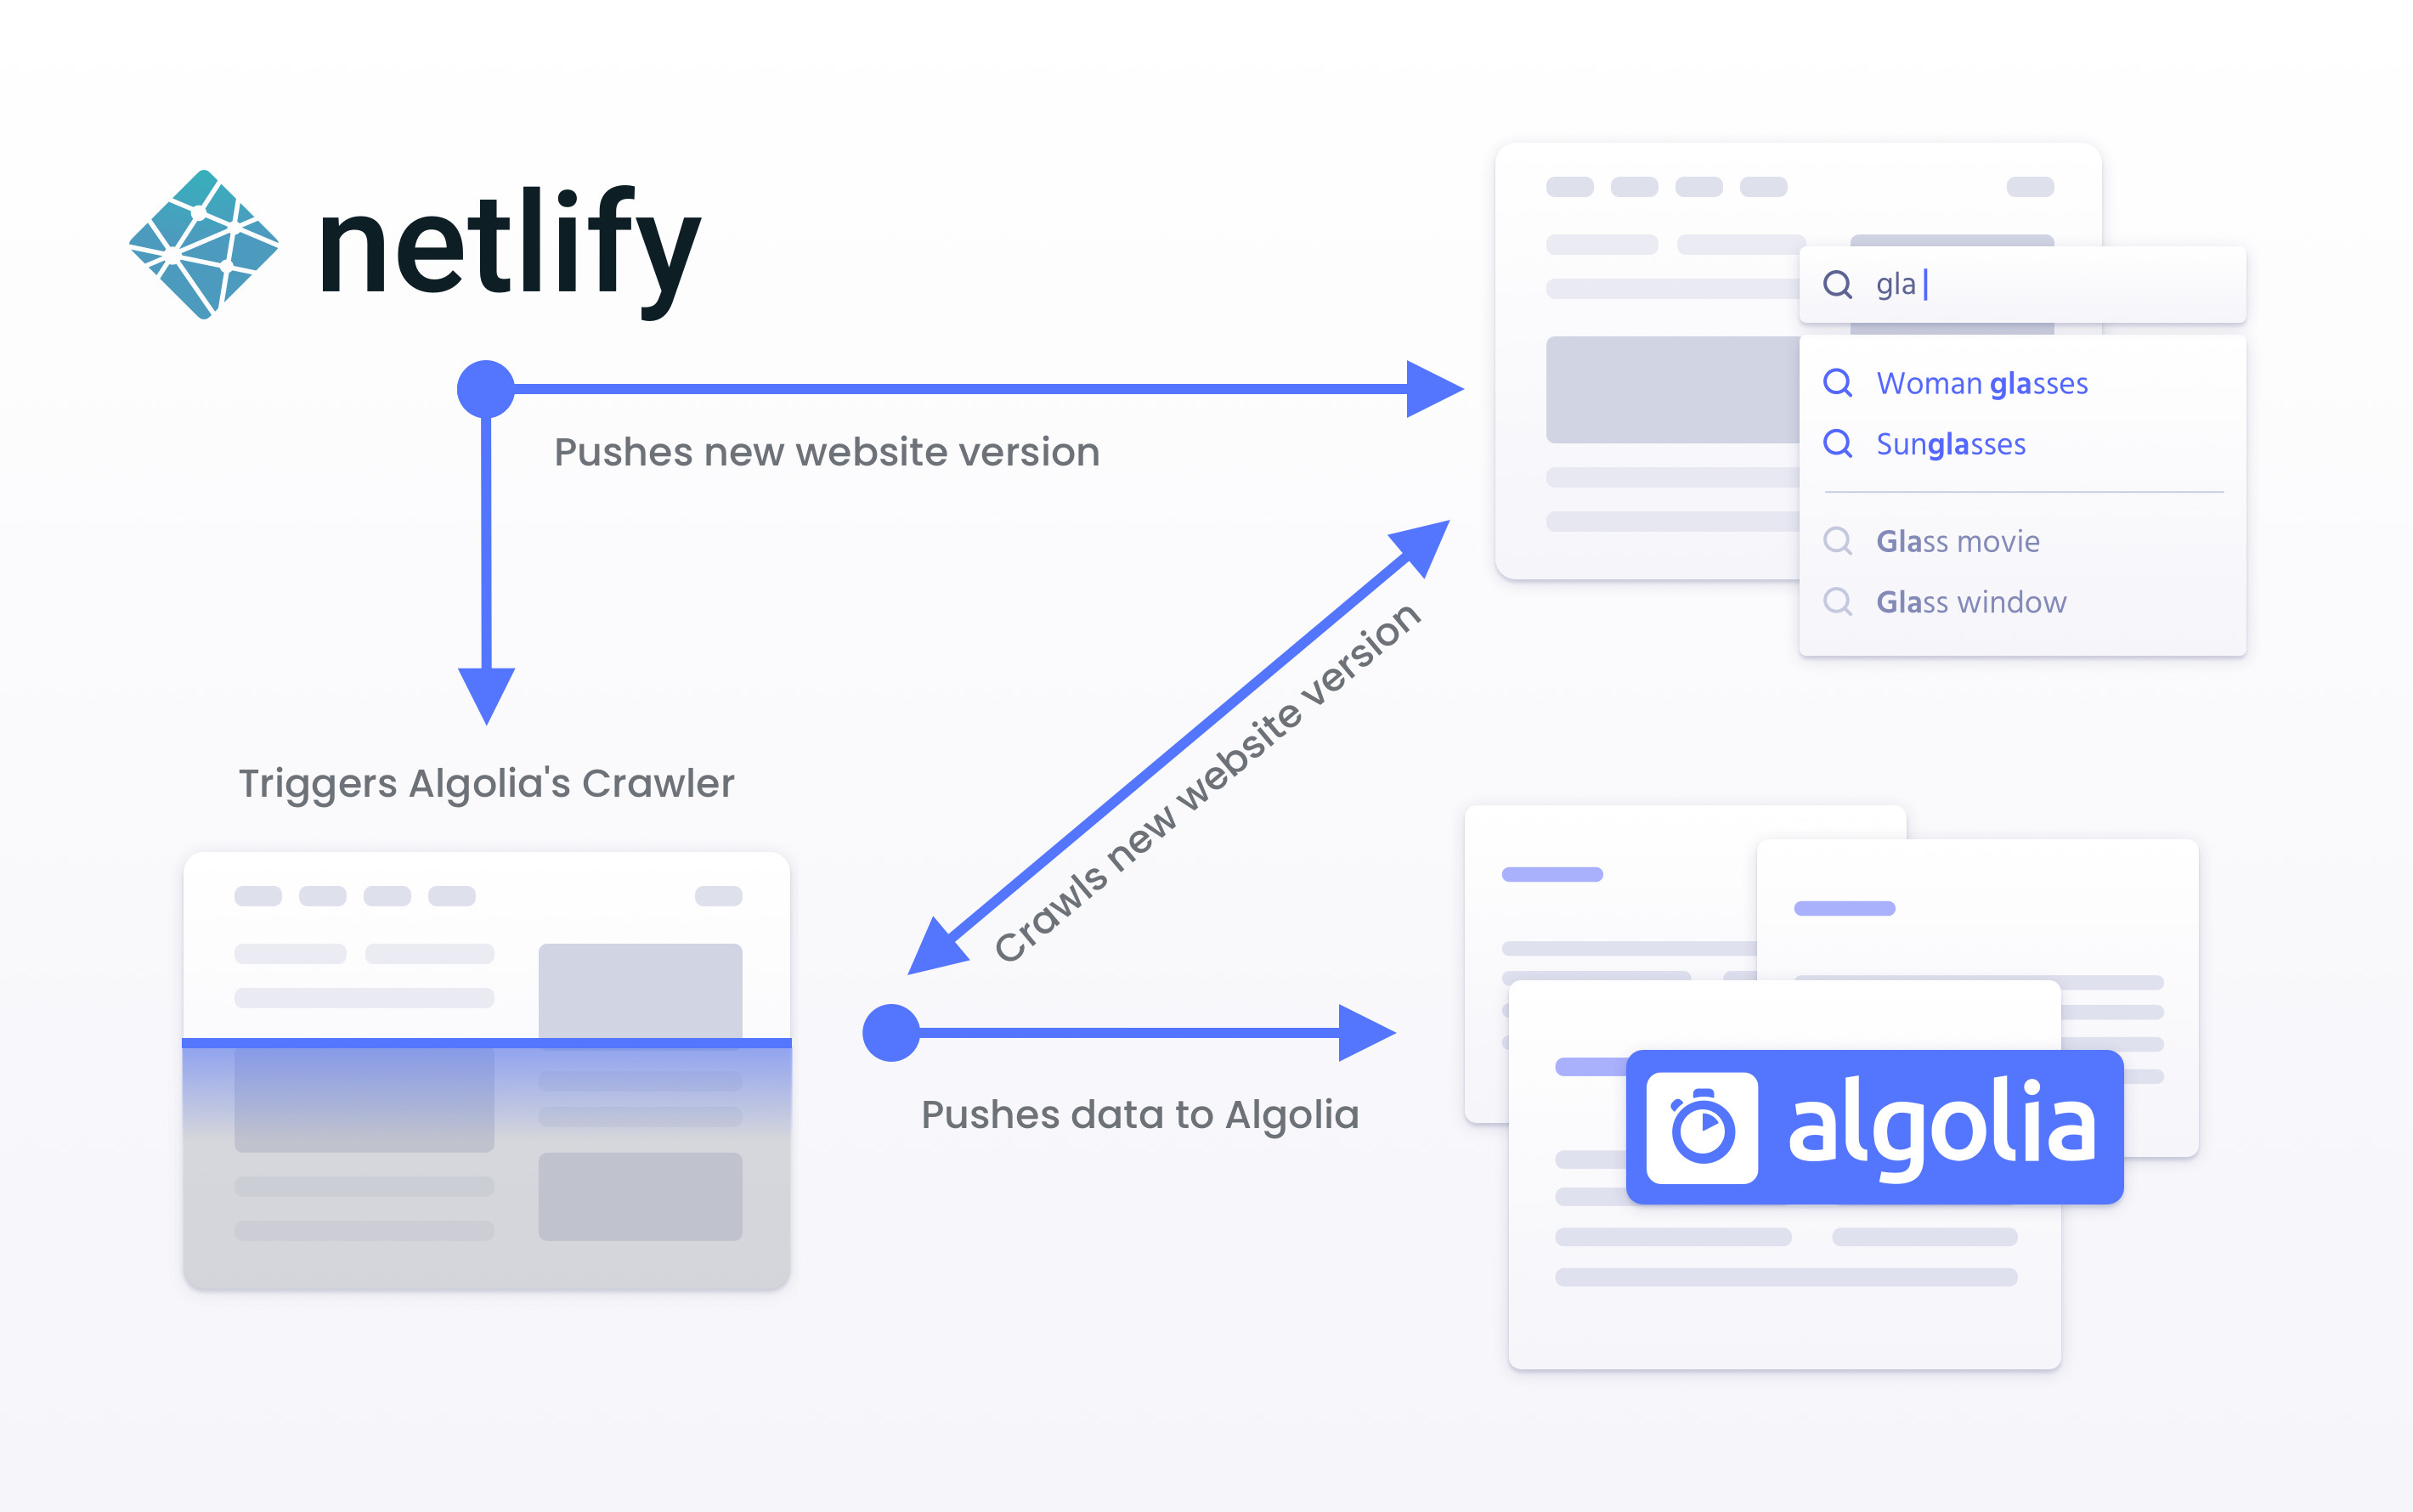
The Algolia Netlify plugin is an easy way to add search on your Netlify website, allowing you to add an Algolia search experience in just a few lines of code. One advantage is that after setup, the search results provided by the plugin will evolve with your website content, automatically refreshing each time you publish a new version of your site, which removes the hassle of maintaining the search index. Each time you publish a new version of your site the plugin triggers a crawler that browses and extracts your website's content and pushes it into an Algolia index.
How we built it
The goal of the plugin is to offer an easy-to-setup Netlify search experience by leveraging the following existing Algolia products:
- The Search API, the actual search engine
- The Crawler, an add-on that crawls websites, extracts pages content into structured data, and pushes them into Algolia
- The Autocomplete.js UI library
Our main objective was to create a Netlify plugin that would, after each deployment, trigger the Crawler to browse the website and build a ready-to-use Algolia index. This sounds simple, but you will see that there were a lot of things to put together in order to provide a great user experience. In the following sections, we will detail the work that was needed on each existing and new component.
Algolia account and authentication
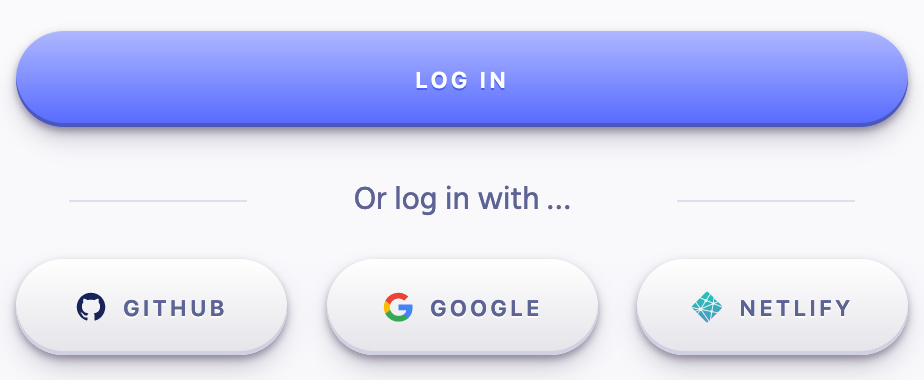
To use Algolia, the first requirement is to have an account. Then, to access the Algolia Crawler interface you need dedicated permissions, normally activated manually. To provide a smooth experience, and avoid having the users to copy/paste tokens or request accesses, we added a new login option: "Login with Netlify" that is integrated with Netlify's OAuth2 API. When you login to Algolia with your Netlify account, we automatically create an Algolia account (or link it if you already have one), and grant access to the Algolia Crawler interface. We also retrieve and store a Netlify token, that we'll use later on.
Crawler UI Updates
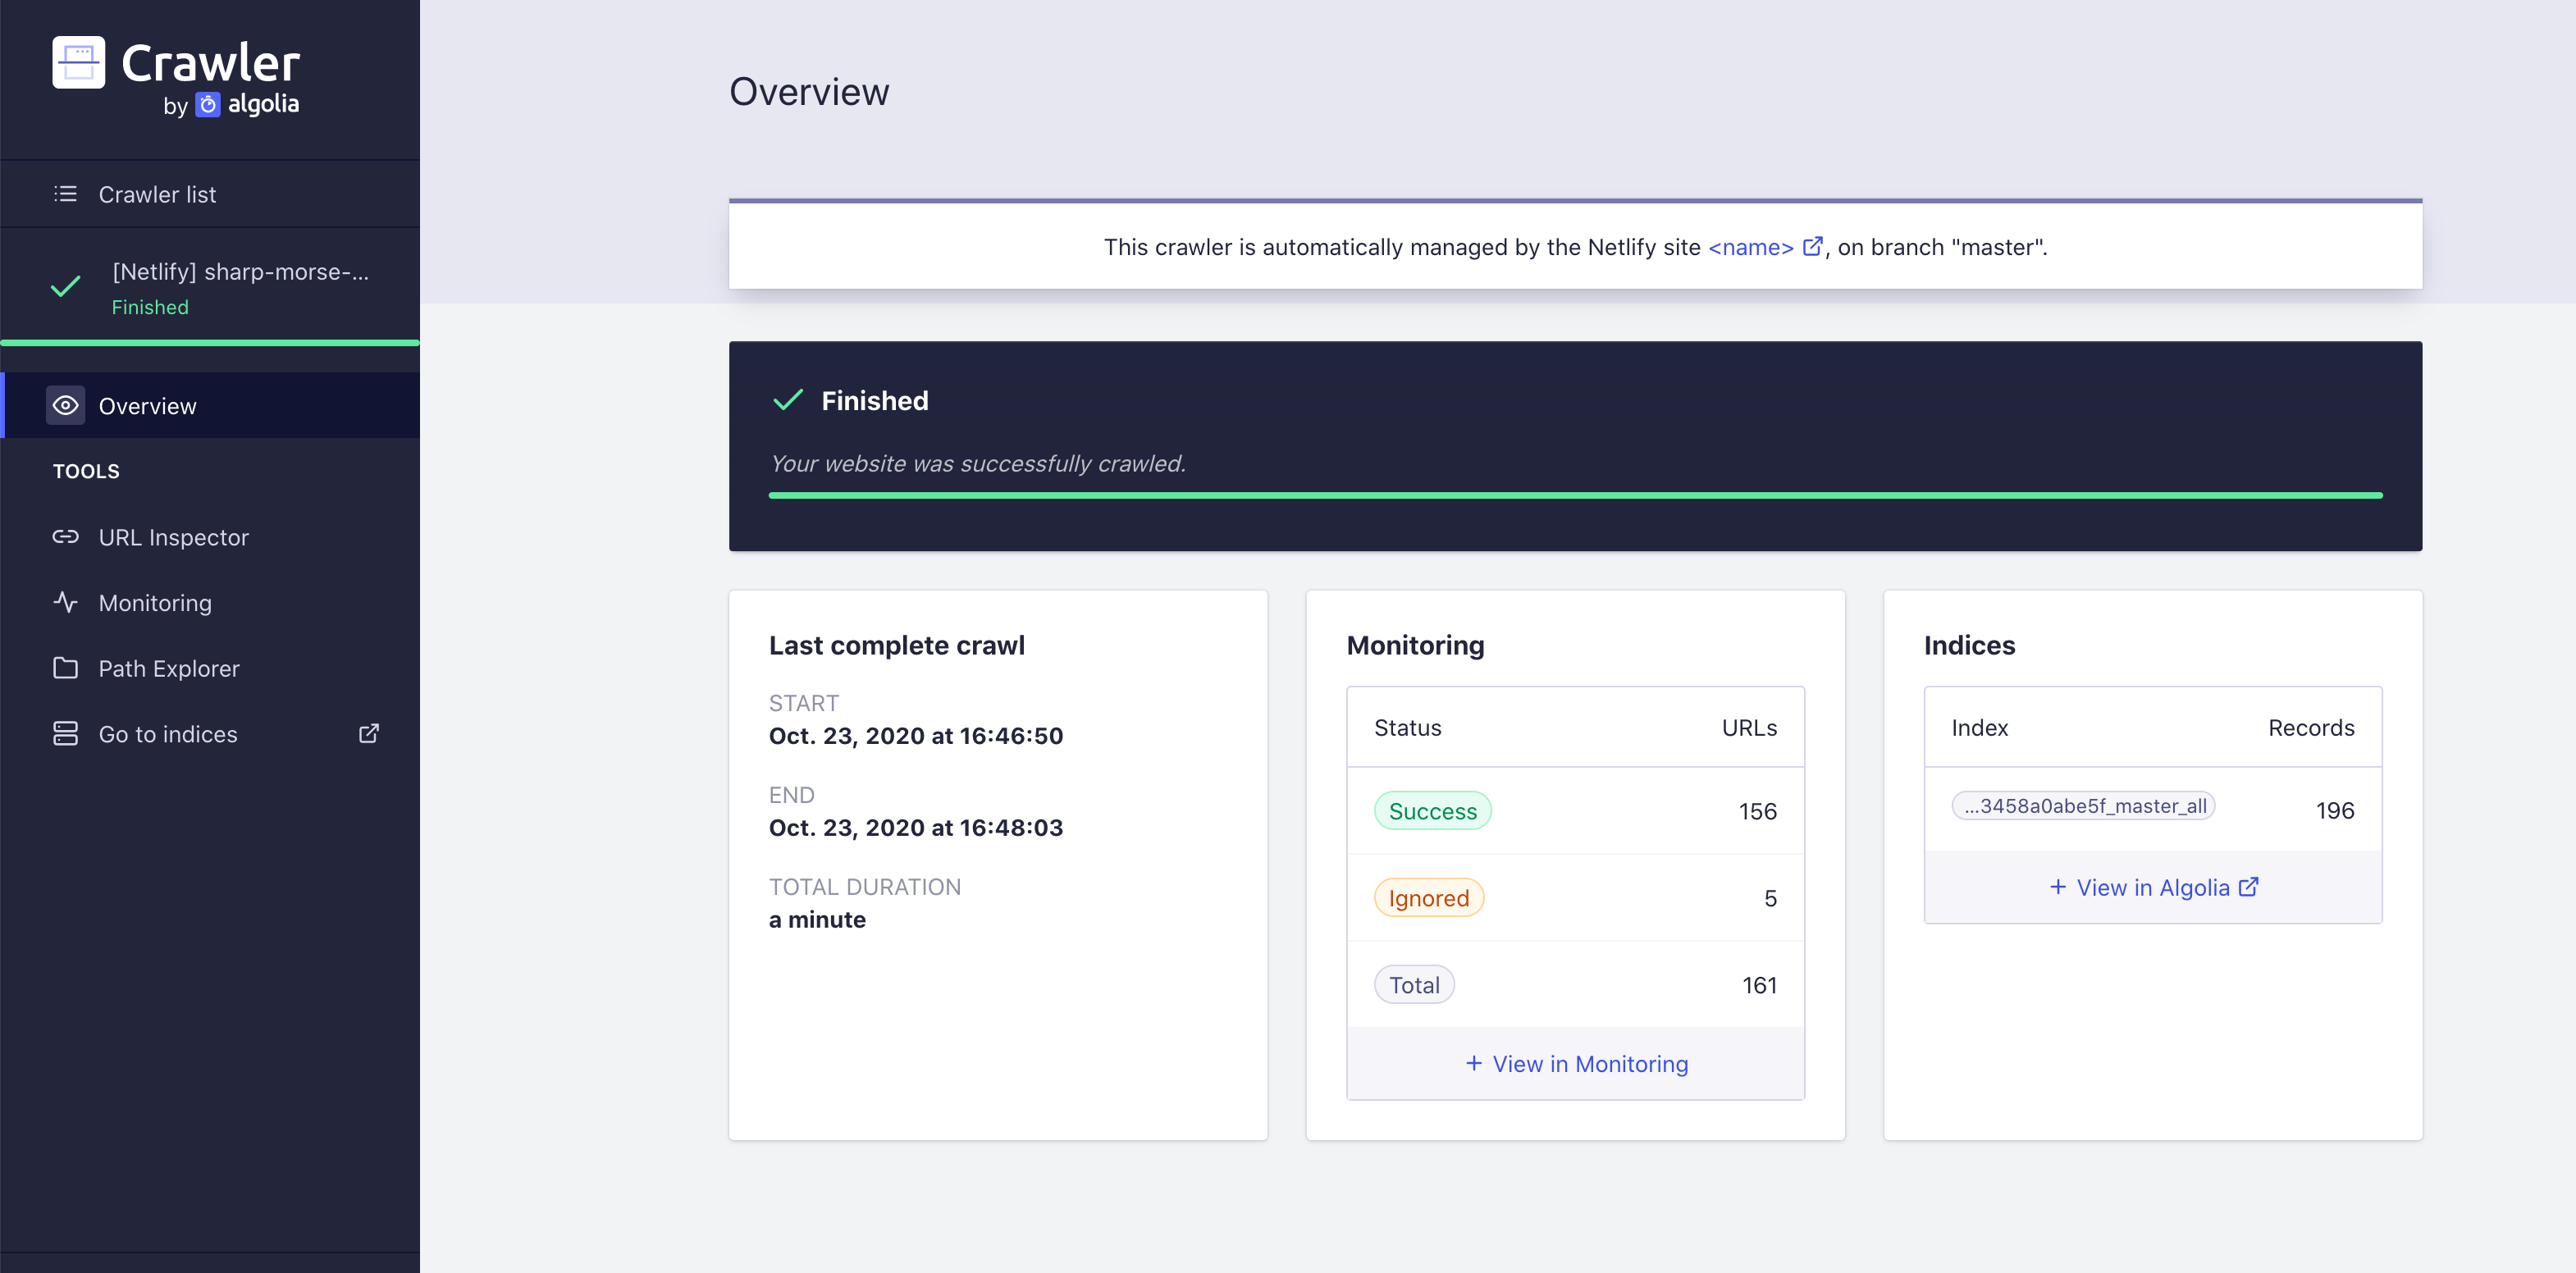
We needed to provide a reporting interface for users to know how the Crawler was behaving on their website. To make this a smooth experience we give Netlify users access to the existing Crawler interface, with a few tweaks.
To manage the available tools, we introduced a new "Netlify" role that provides access to some of the advanced configuration screens and most of the advanced debugging tools that we provide to our normal customers.
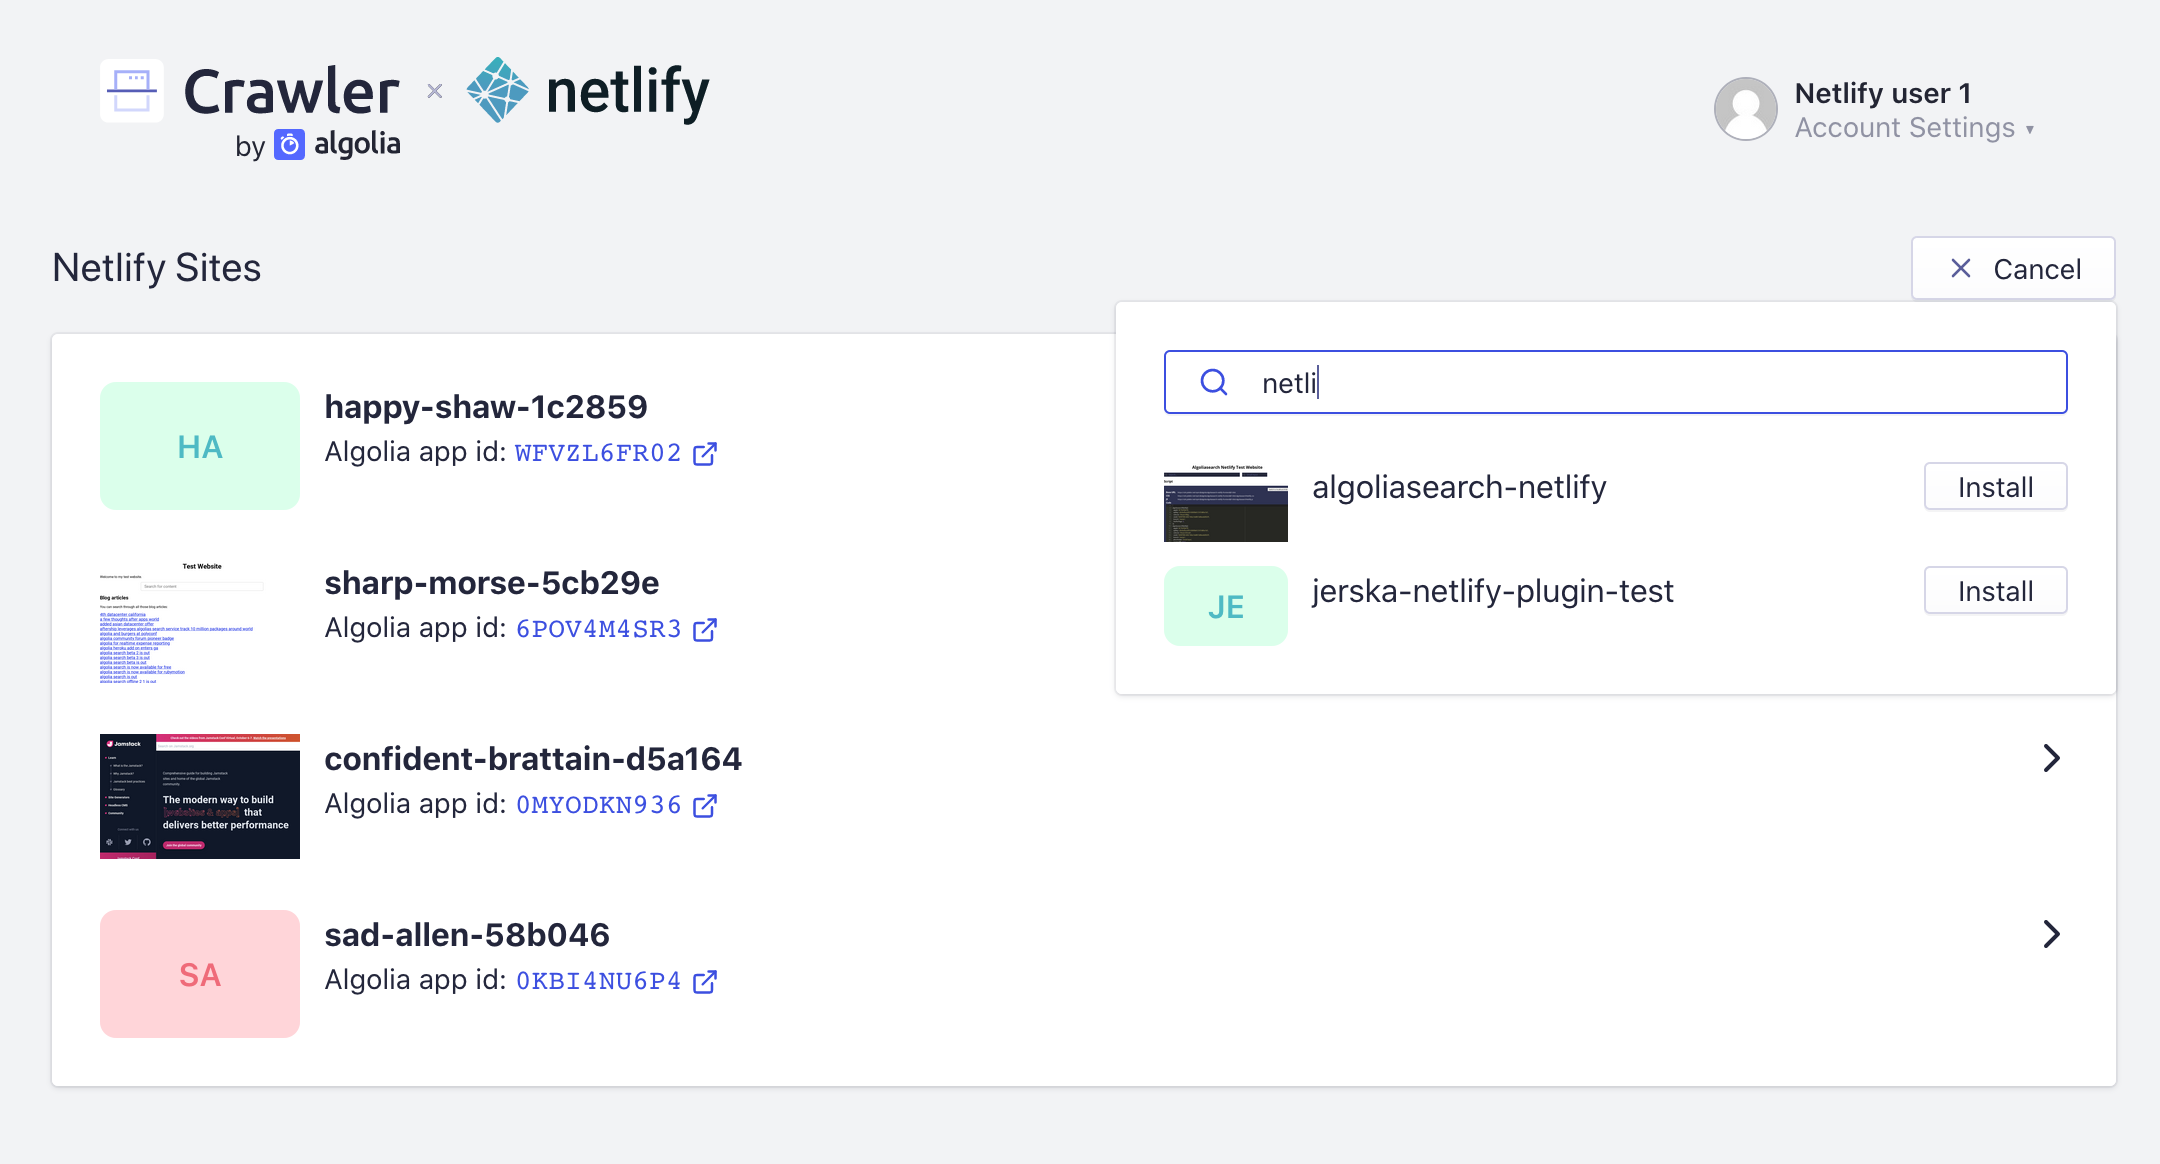
This Netlify role also grants access to a few extra pages that were developed exclusively for the plugin and are only available for Netlify users. These pages permit to manage the plugin installation on the Netlify sites. They use the OAuth token that we retrieve during authentication to talk with the Netlify API, list the sites of the user, and push the necessary API credentials to Netlify when the plugin is installed on one of the sites.
API update
We already had a public API to programmatically manage a crawler. What we needed was an extra endpoint dedicated to Netlify tasks when a website is deployed:
- Create a crawler if none already exist (we create up to one crawler per branch)
- Update the settings according to the options set in
netlify.toml - Run the actual crawl
This endpoint is called when a build is triggered on Netlify. It is protected by credentials that are automatically added to the environment variables of your Netlify site when you install the plugin from our Crawler interface, thanks to the OAuth token.
Data extraction
Algolia Crawler was originally named Algolia Custom Crawler, as the data extraction can be fully customized. Indeed, our crawler enables paying customers complete control over the data extracted using a recordExtractor function, a JavaScript function that you have to implement yourself. It exposes the DOM of each visited page through a Cheerio instance, and you have the responsibility to extract the data and return structured records:
recordExtractor: ({ $, url }) => {
  const hierarchy = $('.breadcrumb > ul > li > a')
    .map((i, el) => $(el).text())
    .get()
  const content = $('#main-content .section-main p')
    .map(function() { return $(this).text() })
    .get()
    .join(' ');
  return [{
    url,
    hierarchy,
    content,
  }];
}
This is a premium feature which produces stellar results, as each of our customers can create a function tailored for its website, and extract exactly the desired data.
For the Netlify plugin, we wanted to provide a generic solution that would handle most websites and without the need of any code or advanced configuration. The challenge is that every website is very different, and even though HTML now provides a lot of tags to structure the content of a page, most websites still rely mainly on good old divs. This makes it more difficult to extract the actual content and get rid of the rest (menus, footers, etc...).
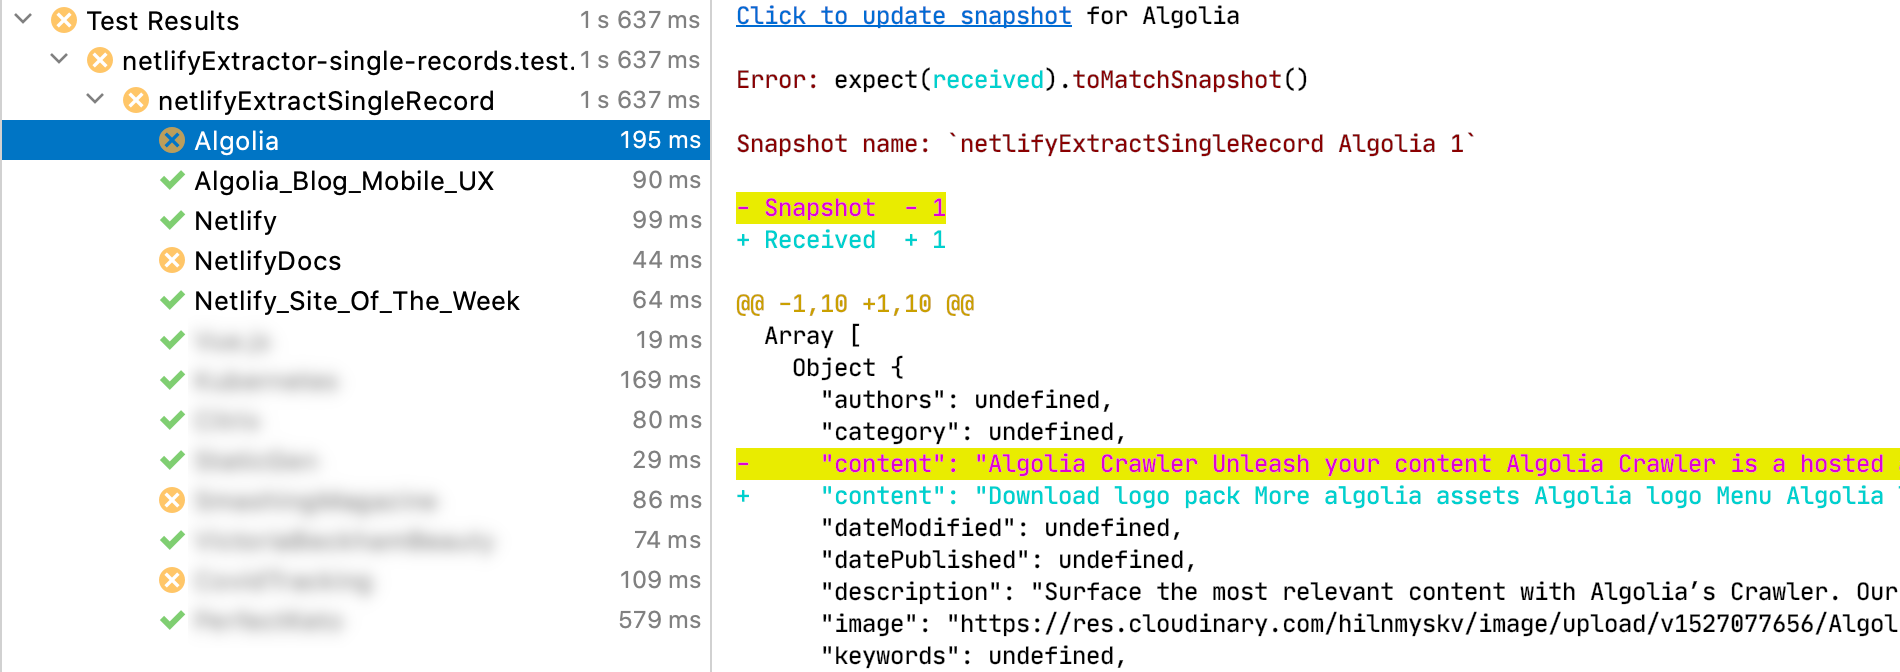
There is no magical way to do this. The solution is to start with a simple extraction function that tries to extract the content from multiple places in each page and test it on real webpages. From there, we can identify common patterns and iterate. To be sure that each modification in the extraction process is beneficial, we took the time to make snapshots of various web pages (hosted on Netlify of course!), run the extractor on them and create extraction snapshots. This way, each time we tweak the extraction algorithm, we immediately see what it breaks or improves:
Front-end bundle
An important piece in a great search experience is the front-end to display the search results, which is always up to the website maintainer to build and integrate. At Algolia, we have many libraries available to help our users with this process, but with the Netlify plugin, we wanted this step to be even easier. Since we know the structure of the extracted records, we decided to build a pre-packaged UI based on Autocomplete.js, a very lightweight autocomplete library that we develop internally and have been using to build DocSearch UIs for years.
The result is that, by copy/pasting those few lines in your website code...
<link rel="stylesheet" href="https://cdn.jsdelivr.net/npm/@algolia/algoliasearch-netlify-frontend@1/dist/algoliasearchNetlify.css" />
<script type="text/javascript" src="https://cdn.jsdelivr.net/npm/@algolia/algoliasearch-netlify-frontend@1/dist/algoliasearchNetlify.js"></script>
<script type="text/javascript">
  algoliasearchNetlify({
    appId: '<YOUR_ALGOLIA_APP_ID',
    apiKey: '<YOUR_ALGOLIA_SEARCH_API_KEY>',
    siteId: '<YOUR_NETLIFY_SITE_ID>',
    branch: 'master',
    selector: 'div#search',
  });
</script>
...that you end up with an autocomplete UI.
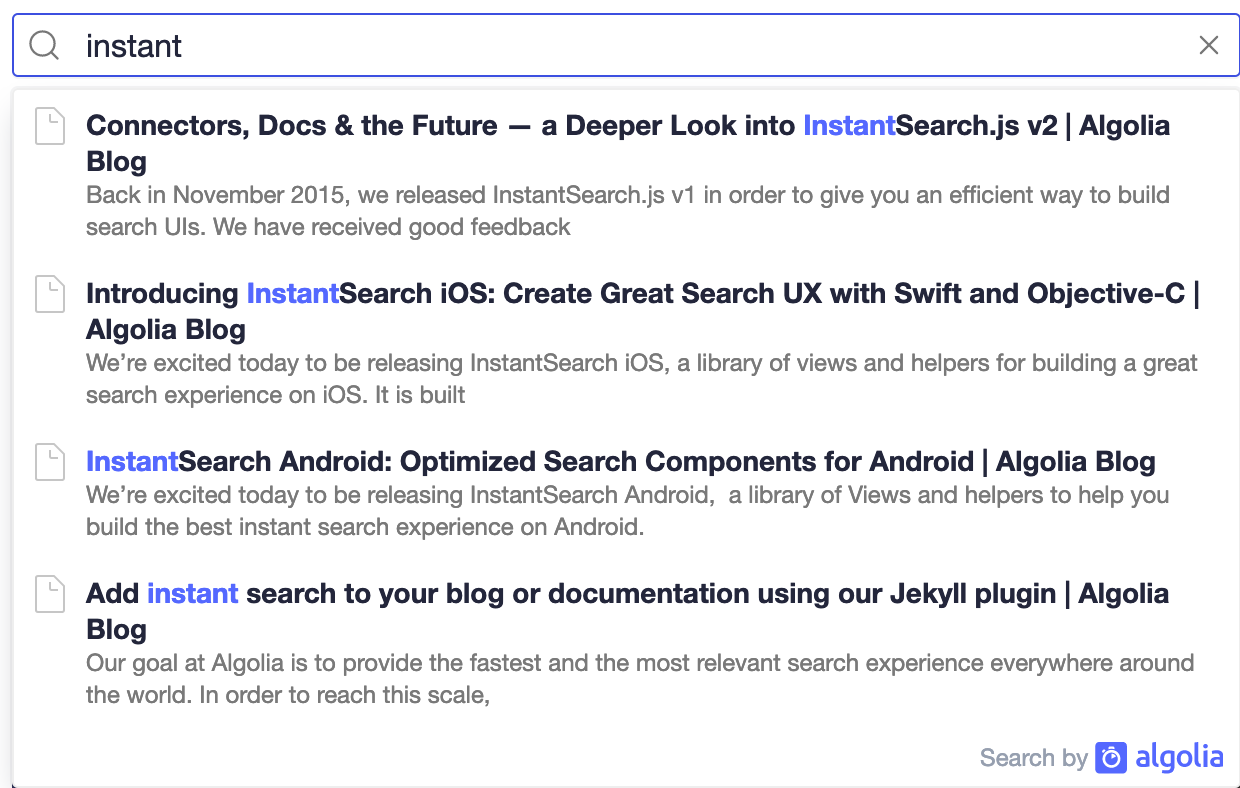
Of course, for the design to be perfectly adapted to your website, we still recommend building your own, but we believe this pre-packaged UI is a great way to get started in a few minutes. Of course, we expose a theme property to let you tweak the colors.
The Actual plugin
The last piece of the Algolia Netlify plugin is... the actual plugin itself!
Creating a Netlify plugin is a smooth experience. Netlify’s APIs and tools are very complete and easy to use, we can see that it's designed to be used with API services like Algolia. The core of our plugin could be summarized to the following API call:
function onSuccess(params) {
  require('https').request('https://crawler.algolia.com/api/1/netlify/crawl', { method: 'POST' }).end();
}
But when we've implemented the initial version, the onSuccess build event wasn't available. The last event triggered by a build was onPostBuild, which is triggered after the build, before the site is published. Since our plugin is meant to crawl the live website, we needed a later event. We contacted the Netlify team who were very reactive and soon enough, the onSuccess event was made available for our plugin. It is at this stage that the plugin calls our Crawler API to trigger the crawl.
Note: the onSuccess event is currently under development by the Netlify team, and the timing of when that event fires could change in the future. Watch for product updates around this topic!
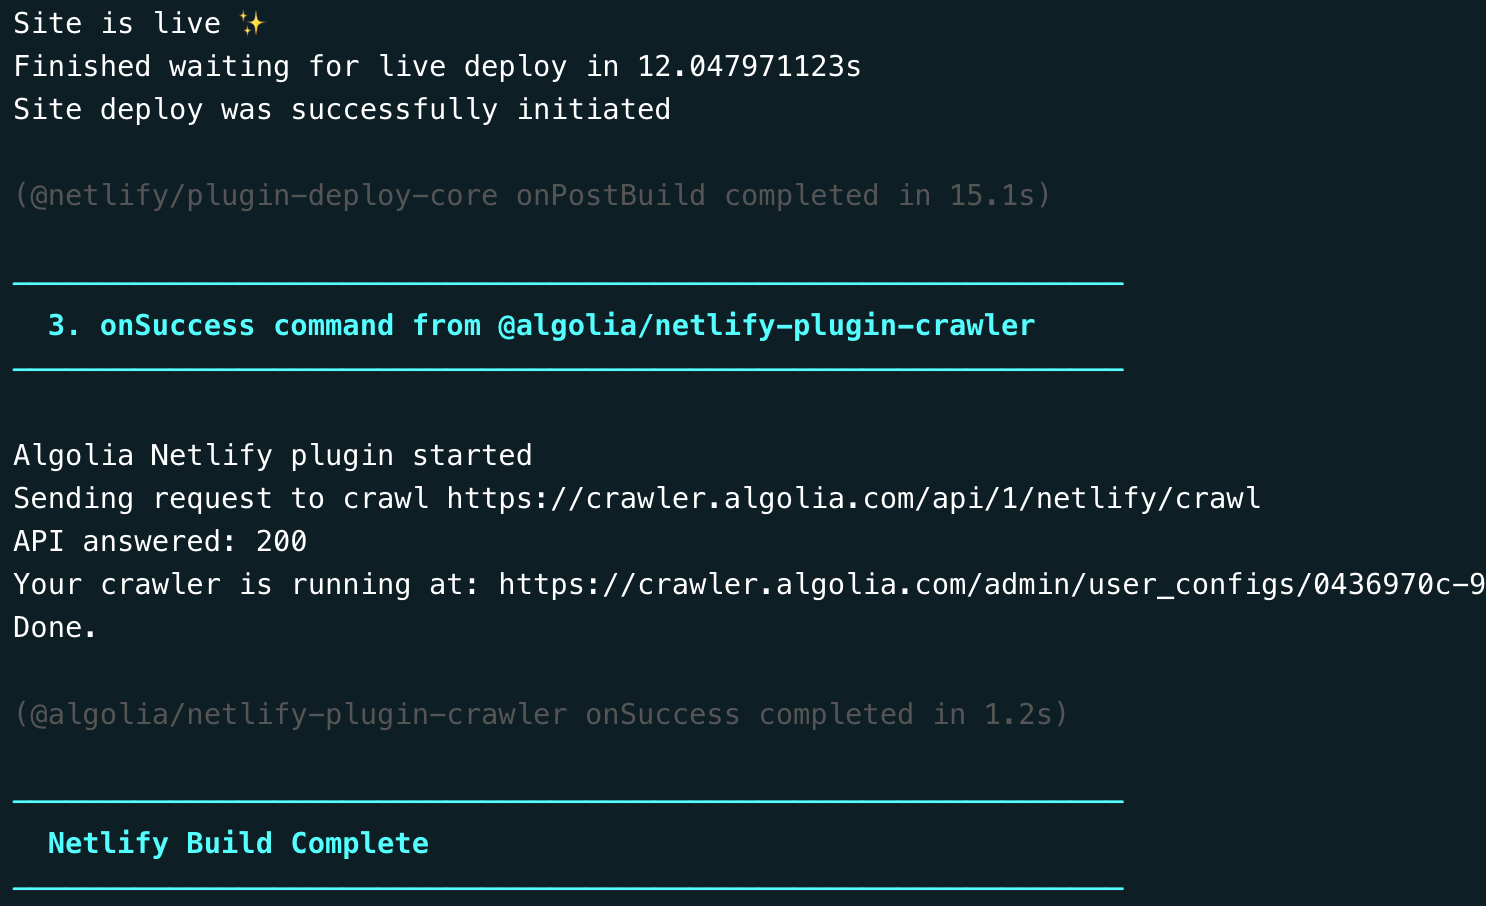
Since the complete crawl can take time (depending on the number of pages of each website), the plugin doesn't block the build process and continues in the background.
Development and release
We decided to put the plugin code and the UI code in the same repository. We also added a directory containing a static test website.

This allows us to have centralized scripts for development and release. Since the Netlify CLI permits to simulate a Netlify build locally, we were able to setup a single yarn dev command, which:
- Runs a development version on the frontend
- Serves a test website, which uses the development frontend
- Trigger a Netlify build which runs the local version of the plugin, and can call a local crawler
It is similar for releasing: Netlify plugins are distributed through npm’s Public Registry. The frontend is distributed with jsDeliver, also relying on npm’s Public Registry. As for our test website, it's hosted on Netlify of course. That means that each time we push all our latest changes on GitHub, the test website is updated. The release process can be summarized in 3 steps:
- Run our release script, which builds the Netlify plugin and the frontend, and publish them on npm
- Push all changes on GitHub
- Submit the new version of the plugin for validation by the Netlify team
Recent changes and enhancements
If you have tried the first beta version of the plugin back in October, we've made a lot of improvements and polish since then! So we wanted to finish this article with a summary of all the changes that have been included in the v1. Try them out!
- 🆕 New option to execute the JavaScript of pages
- 📑 Extraction templates, to extract multiple records per page, compatibles with the DocSearch UI
- ✨ Our pre-built UI now uses Autocomplete.js v1, a complete rewrite of our autocomplete library
- ⚙️ Support of custom Algolia index settings across branches: all changes made on your main index settings will be propagated to new branches
- 💻 Possibility to setup a custom domain
Conclusion
For Algolia, building the plugin with the help of the Netlify team was a rewarding experience, one that we would recommend to other SaaS companies. The work was interesting because a lot of various components were involved, the Netlify tooling is pleasant to work with, and their team was responsive and helped us along the way.
Now after taking a step back, we really think the Netlify Build Plugin is a perfect fit to integrate a service like Algolia.
In the end, it benefits everyone as:
- Netlify can offer a free and easy to setup search feature to its users
- Algolia can showcase its product to 1M Netlify developers
- The Netlify users have yet another plugin available to build their Jamstack sites
For all these reasons, we encourage other SaaS companies to also build their own Netlify plugin! And if you have a Netlify website, try it out!
About Algolia
Algolia is a hosted search API that gives developers a complete toolkit for building search into their products. Our SaaS solution takes the pain out of building and maintaining search. We maintain the infrastructure and API clients for all important programming languages and platforms, and focus on the developer experience with extensive documentation, tooling and support.


