Lambda, DynamoDB, and API Gateway for your Jamstack App
API Gateway
Search for API Gateway, click Create API. In the next screen select REST API and select ‘Build’.
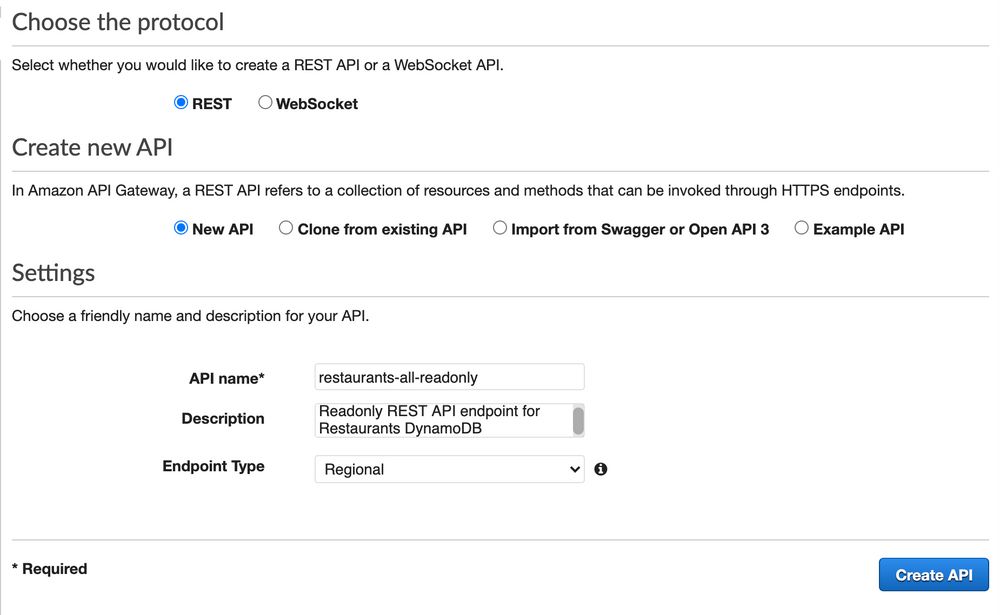
Then, in the Action dropdown, we’ll select “Create Resource”—a pane will come up titled “New Child Resource”. Fill the ‘resource name’ with a name (the path will auto-generate). Don’t forget to ‘Enable API Gateway CORS’ as well and then click “Create Resource”.
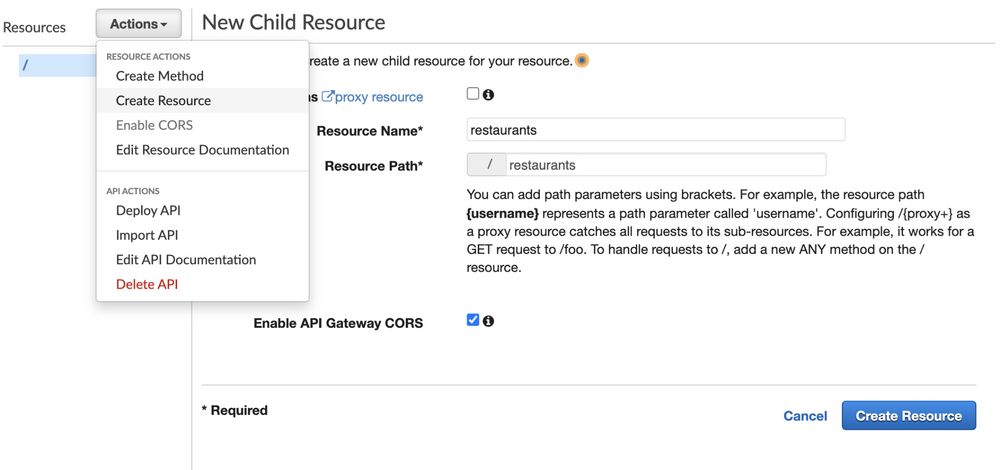
Now in that same “Actions” dropdown, you can select “Create Methods” and then “GET” and click the checkmark that will create it. This will take you to a screen to connect your API to a Lambda. We’ll select this option along with a few others. I use the default location for me which is us-east-2, but yours may be different and that’s fine.
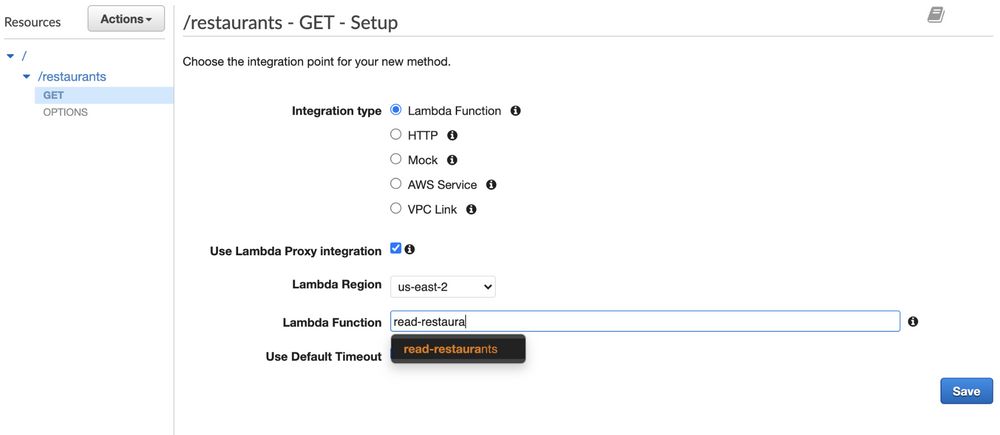
For simplicity’s sake, I’m going to check the box for ‘Use Lambda Proxy Integration’, which is a pretty quick and easy way to bring in your function. It will even auto-fill the function as you start typing, as you can see below. However, as you start to use it more, you might want to not check this as you so that you can retain the ability to configure an Integration Response (disabled for the proxy integration).
Now we’re coming to a screen that will look a little complex, but no worries, you’ll soon know you’re way around here pretty well!
- The Method Request: This is the part of your API exposed to your users. This includes auth, input body, headers, and query string params.
- Integration Request: This is what the API is integrating with to, well, create the API! It’s how the gateway communicates with Lambda.
- Method Response: This is similar to the Method Request, where you can define what the method can return.
- Integration Response: This is what we believe will be coming back from the integration (grayed out here, as mentioned, we don’t have access to it with the proxy integration).
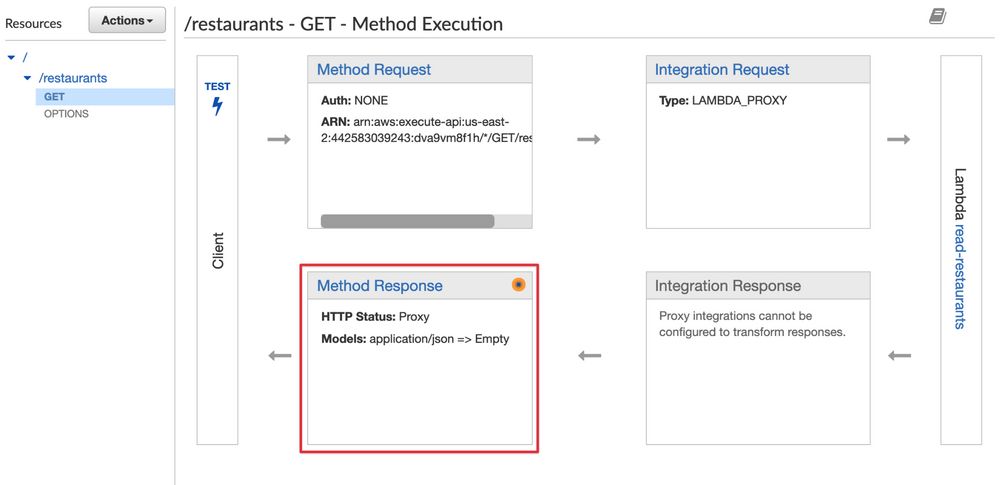
Now, we’re going to select the Method Response (highlighted in red, above). If you click into it, you’ll see a 200 response. Open the dropdown, add “Access-Control-Allow-Origin” so that you don’t run into CORS errors.
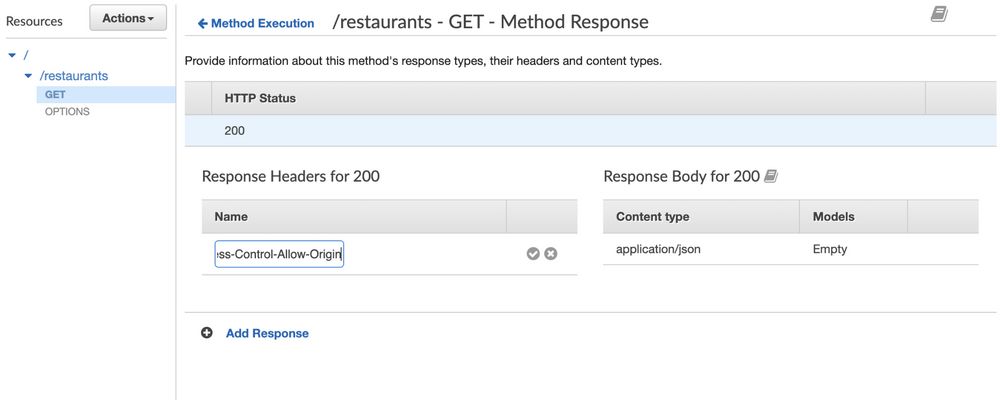
One more CORS-related thing: from /restaurants (or whatever the name of your resource is), click Actions, and then Enable CORS. Click the enable button at the bottom and you should see a screen like this:

Ok! Now it’s time rock ‘n’ roll. Or basically, as rock ‘n’ roll as us nerds get. 🎸
Testing the API
Let’s click the test on the side of the GET Method Execution screen, and click the test button. You won’t need to pass any query parameters because we don’t need any in this case, but you can see how that would be handy if we did.
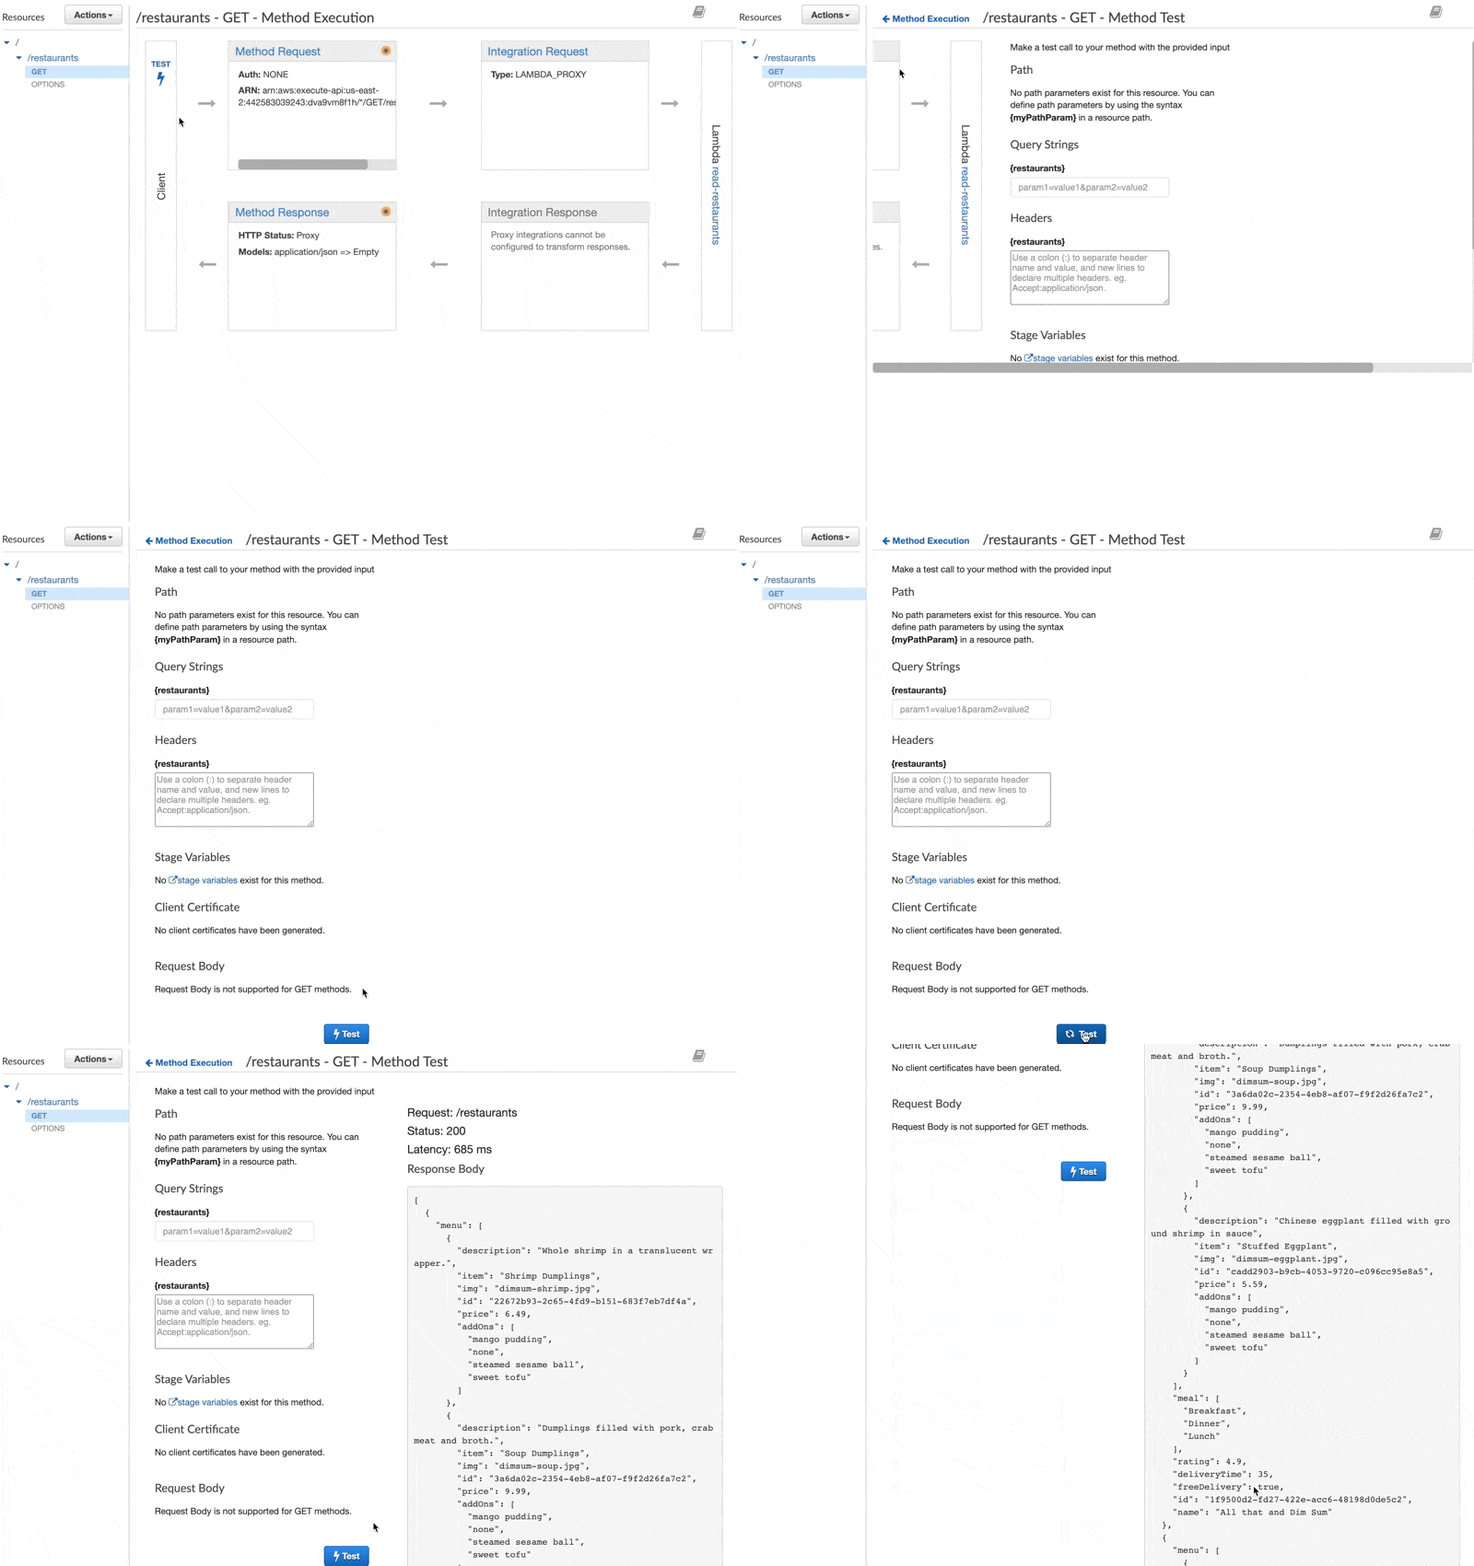
Success!!
We’re getting our response back just as we had hoped.
Let’s Deploy! 🚀
From the top-level of the Resources column (where you see the /), in the Actions dropdown, select “Deploy API”
From here you can create your deployment stage, we’re going to create a production stage, but you can also create things like “beta” and “dev”, etc.
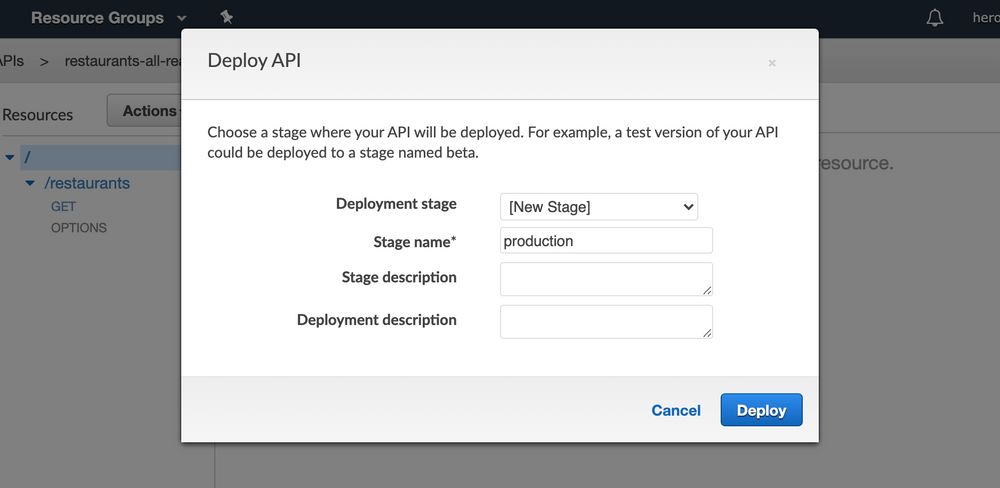
This will give us a screen with an endpoint, let’s take that, append restaurants to the end of it, and check it in Insomnia (you can also use Postman or any other similar service):
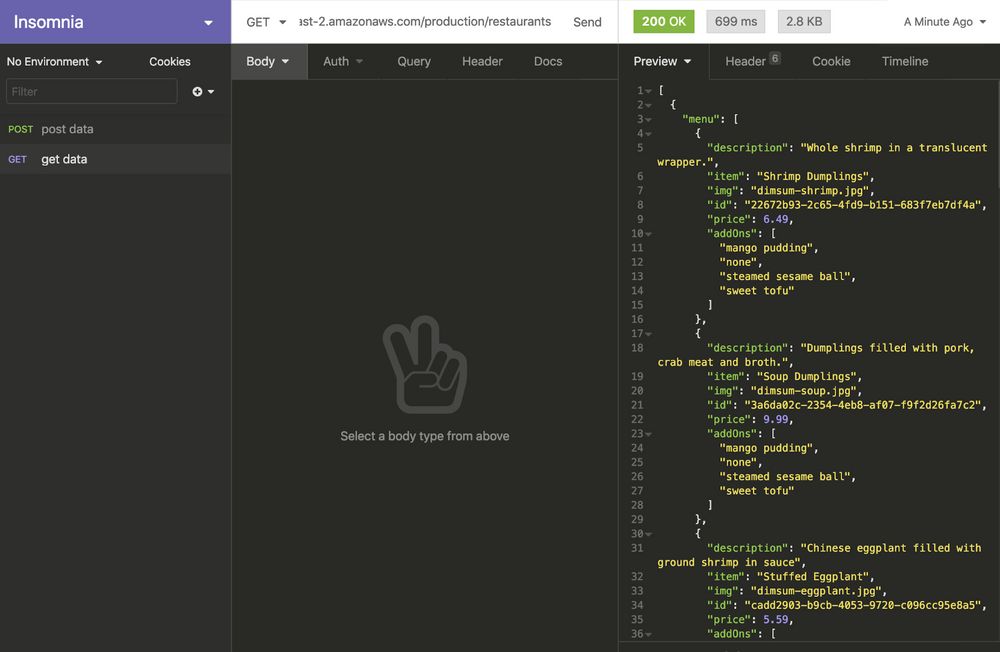
There’s our data!
Now let’s put it into our app :)
I’m using Nuxt, and in an action in the Vuex store, I’ll hit that endpoint and populate some state:
export const actions = {
 async getFoodData({ state, commit }) {
   if (state.fooddata.length) return;

   try {
     await fetch(
       "https://dva9vm8f1h.execute-api.us-east-2.amazonaws.com/production/restaurants"
     )
       .then(response => response.json())
       .then(data => {
         console.log("Success:", data);
         commit("createFoodData", data);
       });
   } catch (err) {
     console.log(err);
   }
 }
};
Now let’s turn this into a plugin so that it’s called when the site is built and the user doesn’t have to wait for it to populate on the client. I’m using the static method and deploying to Netlify, which is a new feature of Nuxt 2.14, and it’s great because I can do things like use the IDs I gave each item to generate unique pages for each of the items in the app. This is out of the scope of this article but I have an upcoming workshop where I’ll build it all from scratch if you’re interested in that part.
The plugin is called getFood.js and in the plugins directory:
export default async ({ store }) => {
 await store.dispatch("getFoodData");
};
And we’ll also make sure to register the plugin in nuxt.config.js:
plugins: [ "~/plugins/getfood.js"],Now we can use the API to populate the page!
https://nuxtfoodapp.netlify.app/
Now we can deploy the whole site to Netlify, use the API to populate the data, and respond to feedback from the user with Nuxt! You can see clearly how we might start to build out other CRUD pieces of this app with DynamoDB storage, creating APIs for POST, DELETE, and so on.
In order to deploy our Nuxt application, we will hook our GitHub or GitLab repo to our project by logging into Netlify, finding the repo and connecting it, and then selecting these options:
Build command:
yarn generatePublish directory:
distWe also want to be sure our application has static as the target. In nuxt.config.js:
export default {
 mode: "universal",
 target: "static",
 …
}
You’ve learned so much so far! Now let’s secure it.
Creating an API Key and Usage Definitions
If you look at the sidebar in API Gateway, you see that we’re in the API section. There are a few other sections, including “Usage”. If you click on that and then the “Create” button, you’ll be brought to a screen called “Create Usage Plan”:
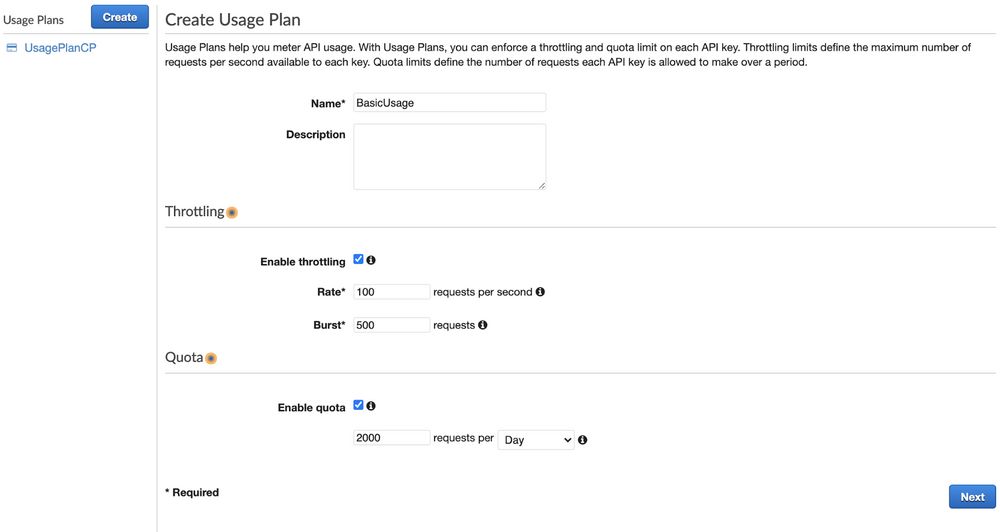
Let’s give your usage a name, and some defaults that you think are sensible.
Once you click ‘Next’, you will be taken to a screen that asks you to associate it with a particular stage. Here we’ll choose our restaurant-readonly API from the dropdown and add the stage production.
After clicking ‘Next’, we will be brought to a Usage Plan API Keys screen. We’ll select “Create API key and add to Usage Plan”
Now in the dialog, we will give it a name and description. We’ll choose auto-generate but you can also pick something.
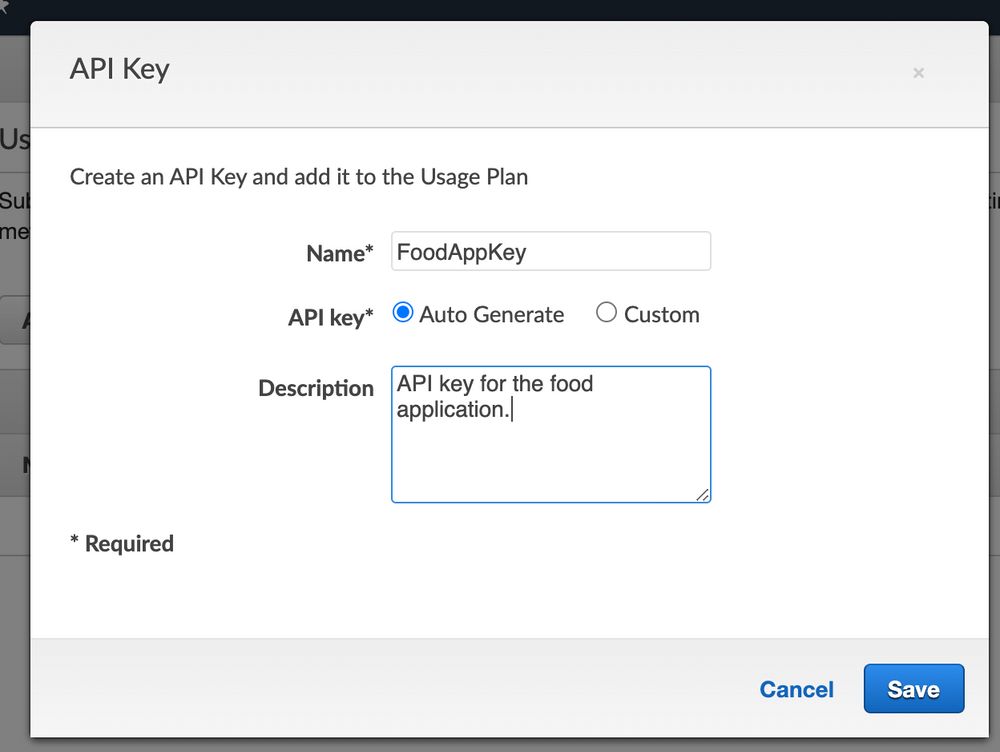
If you click done, you’ll be taken back to the first usage screen. You can go to the API Keys tab and see your API Key there. You can click on the key, and then “show” where it says API Key, and there it is! Your generated API key.
Now, the last step is requiring the key. Let’s go back to our API, and go to the GET method, and click on “Method Request”. There is a field called “API Key Required” in Settings, with a pencil icon. We’ll click on that to edit, and update it to “true”.
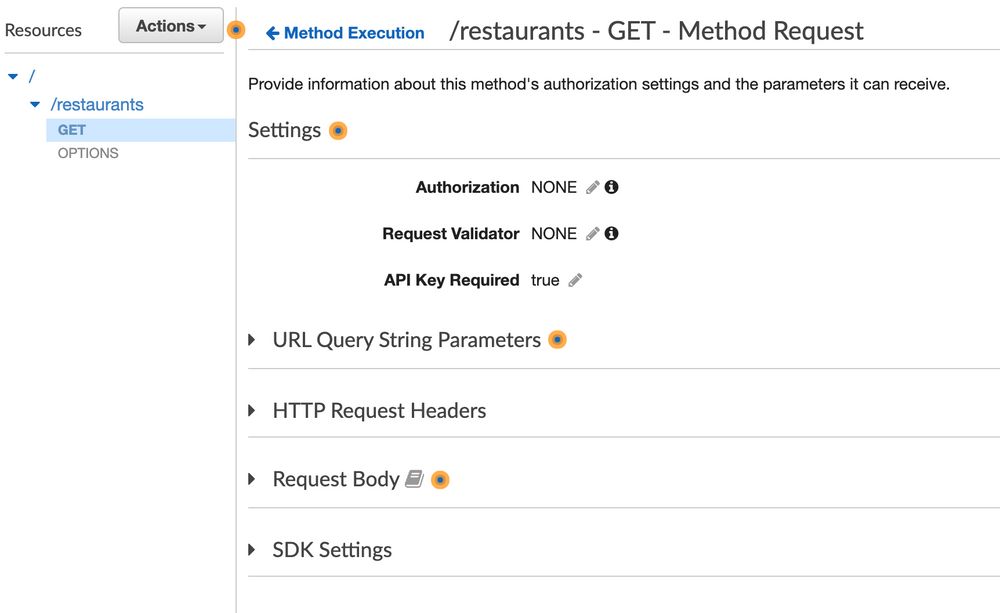
Now let’s deploy our API again, and then go back to Insomnia and test.
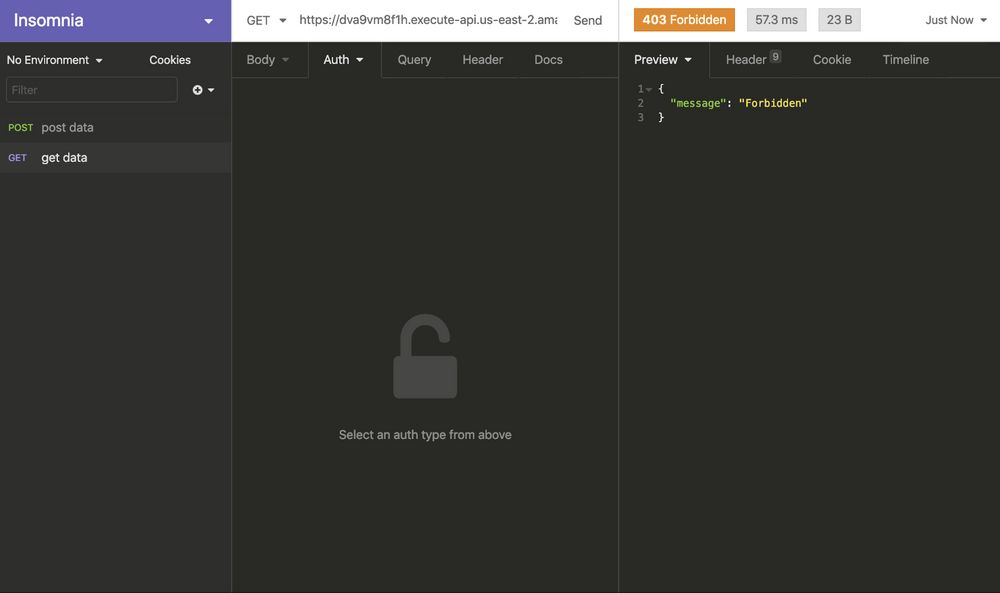
It will now give us a 403 code! Great, that’s just what we want. Now, here’s how we’ll try it with the API key. In the header, pass the key in as ‘x-api-key’, with the key that we retrieved from AWS.
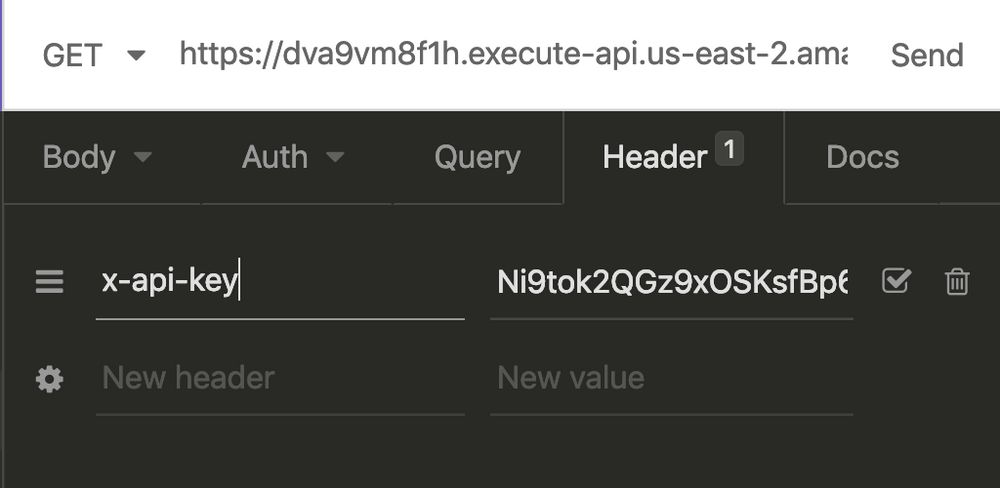
Success! Our API is now returned, but also slightly more secure.
Let’s make sure we’re passing this into our app.